
Wondering how to sew a collar?
If you’ve recently taken up sewing, or it’s something you’re well versed in, you’ll know how tricky the finer parts of garments are.
Getting the cuffs, frills, lapels, and collars right can be a nightmare – and fudging on those areas can cause an entire project to look shoddy.
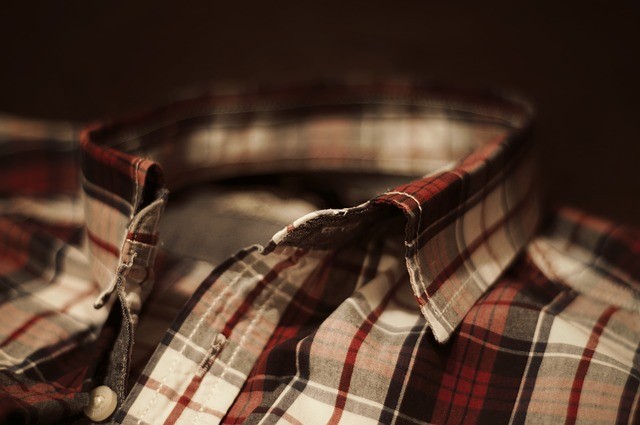
The shirt collar is a noticeable area, and having to work with the curve of both the garment and neck can be slightly daunting.
However, sewing a proper collar is a must-have skill for anyone behind a sewing machine. We’ve got a few helpful pointers to get you started!
How to Sew a Collar On Shirts
When learning how to sew a shirt collar, it’s important to note that the collar is technically two parts.
There’s the actual collar, and the collar stand it sits on. Both of these are attached to the shoulder of the shirt, for what we know as “the collar.”
For this article, we’re focusing on how to create the shirt collar by itself.
Making a crisp and precise shirt collar can be a meticulous process, and you’ll need to choose your materials wisely. But the pay off is an entire world of design options, literally at your fingertips.
What Materials Will I Need to Sew A Collar?
Here’s what you’ll need:
- Two pieces of shirt collar cut from your main fabric of choice.
- A shirt collar cut from a piece of sew-in interfacing.
See our guide to interface sewing.
Best Method for Sewing Collars
- To start, grab your collar piece in your chosen main fabric, and a shirt collar piece cut from interfacing.
- Next, draw in your seam allowances along the short edges (the sides), and the longer top edge. Then, trim the seam allowances from your interfacing piece. Your seam allowance is simply the area between the stitching and the edge of two or more materials being stitched together.
- Lay the interfacing on top of one of the collar pieces. Be sure the interfacing is against the “wrong” side of the collar (the side that won’t be seen in the finished product). Here, you can check to be sure the edges of your interfacing are exactly 5/8th inch smaller than the collar piece and trim to where it extends too far into the seam allowance.
- Fold the collar in half. Mark the center of the interfacing and fabric by clipping into the seam allowance. Try to get them about 1/8th inch into the seam allowance. This will make it easier to line the pieces up.
- Next, glue-baste the interfacing to the collar piece. (Depending on the fabric, and your preference, you can use two pieces of interfacing to make the collar crisper.)
- Taking the second fabric collar piece, trim ¼ inch from each side of that collar that hasn’t been interfaced. Go slowly to ensure accuracy.
- This is where things can get tricky. Line up the right sides of the collar and the undercollar. You’ll notice the ends don’t match up because we’ve trimmed one of the collar pieces. This is where using the points in the middle comes in handy.
- Edgestitch around the edges of the interfacing. As you’re doing this, pull the un-interfaced collar so it stretches to fit the top layer. On the sewing machine, sew with the interfaced side on top. Start in the middle and work your way out to the edge. Repeat, sewing toward the other corner edge.
(Note: Edgestitching is simply a line of stitching 1/8th inch away from a folded edge or seamline. It’s essentially topstitching, but meant for a specific place—very close to the edge of your project.)
- After sewing one side, it will be puffed up on the interfaced side. The top layer will not be completely flat, but this is part of the process, for the collar to curve around the neck.
- Flip the collar around (not over) and sew from the middle to the other point. Using both hands allows you to pull the underlayer tight while sewing, and prevent any final product bunching.
- Trim the corners and fold each corner in. Press them to make the seam allowances shift to the right place after turning the collar right side out.
- Turning the collar right side out, poke again. Use a point turner to poke out the very edge of the collar points (if you want that crisp and neat look, that is).
- Press the collar, but don’t worry about making it lie flat. If you’ve stretched the undercollar correctly, the ends of the collar will curve upward slightly.
- Now, we’ll topstitch the collar. You have to stretch the undercollar as you topstitch or you will wind up with it bunched up at the other end, having pushed the fabric down as you sew.
- Fold over the seam allowance, along the raw edge of the collar, pressing toward the undercollar. Press the fold in place. Make sure to smooth out the undercollar, making it flat and even. The top edges most likely won’t line up, but this is fine.
- Baste your collar close to the fold, about ¼ inch away from the fold. From here, you can trim down the seam allowance to ¼ inch or leave it at 5/8th inch for now.
Here’s a video explaining more details about the process of sewing collars.
And there you have it!
With these tips, we hope you can add more of a personal flair to all of your sewn garments.
See more: 10 tips and tricks for sewing collars.
Do you have any tips for sewing collars?