
During your foray as a beginning sewer, you may have encountered patterns that told you to add interfacing. Most of the time, new crafters don’t even know what interfacing is.
This isn’t shocking, as interfacing is hidden from plain view. As a matter of fact, there are people who don’t use interfacing at all!
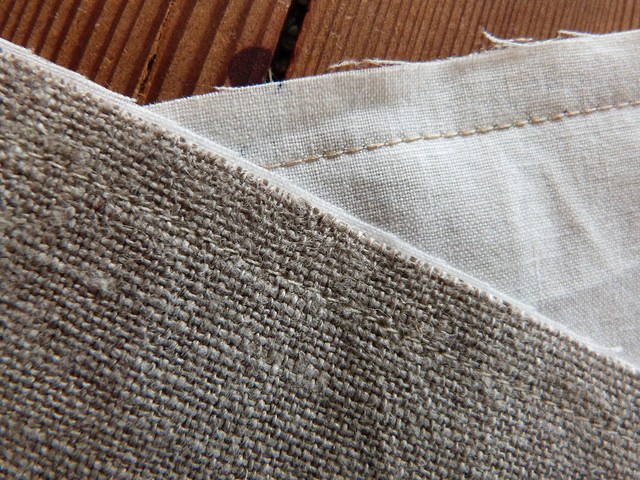
Have you ever noticed when you buy clothes from a shop, that sometimes parts of the clothing has a hidden layer behind it? You would usually see this in collars, especially in outward facing cuffs, and even in necklines.
Touching the fabric, you would notice that these parts are stiff, supported by this additional layer. It’s not for aesthetic purposes, as this layer is hidden. This layer of fabric is called the interfacing.
Interfacing is a term used to refer to a piece of textile attached to the wrong side of a garment to make the garment more rigid.
You could think of it as additional support for clothing; it adds structure and firmness to help keep the right shape and body.
[toc[
Fusible vs. Sew-in Interfacing
Interfacing fabric comes in two main types: fusible and sew-in.
These two types refer to how interfacing is added to your material. Each of them has their own pros and cons, and learning when to use each is an important skill in sewing.
Fusible interfacing, also known as iron-on interfacing, takes its name from the word ‘fuse.’ The interfacing is literally fused onto your material.
Fusible interfacing has an adhesive to one side, which allows it to stick to your fabric using heat. This heat is applied by ironing one side of the interfacing so that the adhesive will melt and stick.
Sew-in interfacing, as its name would imply, needs to be sewn on. Sew-in interfacing can be applied like you would attach any other fabric, and can sometimes be called non-fusible interfacing.
Most of the time, you’ll want to choose fusible interfacing, as it requires less time and energy. However, deciding when to use fusible or non-fusible depends on the properties of the fabric that you wish to attach the interface to.

here are simply some materials that you cannot use fusible interfacing on, as the fabric would get ruined.
As a rule of thumb, use sew-in when you are working with delicate fabrics or fabrics that will be ruined by heat or glue. Otherwise, for every-day, casual projects, fusible interfacing will give you the results that you need.
When to Use Interfacing Fabric
There are three main functions of an interfacing. First, it adds stiffness to the fabric. Most commonly, you will find interfacing inside shirt collars, so that they will stay upright. You may also notice interfacing inside the handle of handbags so that they keep their shape.
Second, interfacing is used to strengthen an area of fabric. This is commonly seen in areas where buttonholes or zippers are sewn, or on the inside of pockets.
Third, interfacing allows a project to keep its shape. This is especially important for fabrics that tend to stretch, such as knitwear.
You may notice that there are bags which keep their shape even if they’re unusually soft; interfacing allows this to happen.
The Color and Weight to Choose for Interfacing
With all the different types of interfacing out there, how do you know which one to choose?
The two main elements of an interfacing are color and weight.
Choosing Color
Interfacing comes in either a dark or light shade, and choosing between these mostly depends on your own preferences. However, for practicality, you should try to match the shade of the fabric that you are attaching the interface to.
Even if it is a hidden layer, there may still be instances wherein the interface peeks through, and a huge contrast between the fabric and the interface can look unprofessional.
Choosing Weight
Interfacing comes in three different weights: light, medium, and heavy. Patterns usually specify the weight of the interfacing that you should use, but if it isn’t specified, choosing the weight on your own isn’t as hard as it seems.
As a rule of thumb, try to match the weight of the interfacing with the fabric. You can go a bit lighter, but do not attach an interfacing that is heavier than the fabric.
Should you need to have a more rigid structure, change the fabric that you are using to ensure that it can handle the weight of the interfacing – or else it will sag anyhow.
Alternatively, you could test out different weights on a small patch of fabric to ensure that it has the intended effect. You can check out an example of that here.
Here’s a video showing more information on the basics of interfacing fabric.
Different Types of Interfacing Sewing
Because your interfacing should depend on the type of fabric that you’re using, there are a lot of different options in today’s market.
Choosing the right one depends on the fabric that you want to attach it to, but also on the effect that you want your fabric to achieve.
For a better idea of which match is best, here are a few types of interfacing.
Lightweight Fusible Interfacing
Lightweight fusible interfacing, as its name would imply, is intended for light and medium-weight fabrics. Because of its density, it can provide fabrics with adequate support without bogging them down.
Fabrics with lightweight interfacing can still achieve drape and flow, all while being supported. Because of these properties, a lightweight fusible interfacing is one of the most popular types.
Both hobbyists and professionals would do well with a bolt or two lying around their work area.
Pellon Fusible Interfacing
The Pellon brand is one of the most popular manufacturers. Beginners are most likely to find themselves perusing Pellon products, as they have a wide variety of fabrics and materials.
They also have a wide array of interfacing that you can choose from for your next project. Check out their official listing here.
Double-Sided Interfacing
Double sided interfacing is as the name implies; the adhesive can be found on both sides of the interfacing.
You will need to use double sided interfacing when making garments that need to have fabrics on both sides, such as jackets and coats. This type is also necessary for reversible garments.
Woven Fusible interfacing
Woven fusible interfacing is made with cotton fabric. Upon a closer inspection, you’ll notice that this type looks very similar to fabric, with a visible grain-line, which means it will behave like fabric – and should be treated as such.

Woven interfacing is perfect for projects wherein you want to keep the drape of the fabric that it is attached to. It should be noted, however, that you should cut woven interfacing according to the grain-line.
Non-Woven Interfacing
If woven interfacing behaves similarly to fabric, then non-woven interfacing behaves like paper.
This is because a non-woven fabric is made of compressed fibers. Therefore, non-woven interfacing will be stiffer than woven interfacing, and also tends to wrinkle more when applied incorrectly.
While it may seem like a better idea to go with woven interfacing, this isn’t always the case, especially if you’re a beginner.
Beginners will usually need stiffer interfacing, and woven interfacing is also more expensive.
Unless you are sewing professionally, working with a fine fabric (like silks,) or you’re making a special project (like a gift or for a special occasion), non-woven interfacing will suit your everyday needs.
Knit Interfacing
While interfacing is used to reinforce areas of a project, there will be times when you need to add a bit of stretch to that reinforcement. These instances include knit garments, as well as seams.
Knit interfacing, also known as stretch interfacing, will allow you to do just that. Because they are created by knitting fibers together, they do in fact stretch.
It’s worth noting, however, that knit interfacing often stretches horizontally, and not vertically. When reinforcing seams in your knit interface, remember to use vertically-cut strips to get the interface to stretch with your fabric – rather than against it.
How to Use Fusible Interfacing
Using fusible interfacing can seem like a huge hassle, but adding it to your project isn’t difficult.
First, pre-shrink your interfacing. This can help you avoid changes in size after you have placed your finished project in the wash.
To pre-wash, your interface, place the entire bolt in a tub of water for ten minutes. Fusible interfacing should be washed in hot water. Pat the excess water away with a cloth and let dry for at least a day.
This is an optional step. To make sure that your interfacing is the best choice for your fabric, test it out on a small patch of fabric by attaching an equally small piece of interface. If the weight and support are not to your liking, then use a different type.
Second, cut your interfacing 1/8 inch smaller than the fabric you will attach it to. This is to make sure that no excess glue will stick to a surface other than your fabric. You may want to increase this to 1/4 inch when attaching to thin fabrics.
Third, figure out which side of the interfacing is the adhesive portion. This side will be bumpier and shinier due to the glue.
Fourth, set your fabrics on your ironing surface. Your fabric should be underneath, with the wrong side facing up. The interfacing should be on top of your fabric, with the adhesive side facing down. Then, cover both fabrics with a dampened press-cloth.
Lastly, press the iron to the fabric. Do not move the iron, as it may cause the fabrics underneath to be misaligned. Rather, simply place the iron on top of the fabric, and hold for about ten to fifteen seconds; the heavier the interfacing, the longer you should hold it. Allow it to cool before moving the fabric.
Here’s a video explaining more on how to use fusible interfacing.
Why Use Interfacing?
Truth be told, your project will turn out fine without interfacing. If you’re someone who just sews as a hobby, there really isn’t much reason to add this tool to your projects, unless you feel you need it.
As a matter of fact, you will be unlikely to come across interfacing unless you get farther along in learning how to sew, and the majority of sewing guides won’t include it at all.
The more advanced you become, the more you will encounter it. Most of the time, beginners won’t even know what interfacing is, even if seasoned crafters consider it to be an important part of any project.
There are many people who feel like beginners shouldn’t worry themselves about learning how to use interfacing, and there are others who believe that learning earlier is better.
However, it is generally believed that interfacing provides a level of quality and sophistication that cannot be achieved by projects that are made without interfacing, no matter how well-made those projects are, or how expensive the materials they were made with.
While it may seem like an unnecessary step, adding interfacing can greatly increase the finished quality of your project. Indeed, ignoring the interfacing is a rookie sewing mistake; limp and unstructured areas can make an entire dress look shabby.
Projects made with interfacing just look better. Not to mention, it also benefits your project more so than adding body and reinforcement.

Because of the reinforcement that interfacing provides, it means that your garment will survive more wear and tear and will need to be replaced much later than without interfacing.
Even if it takes more time, money, and energy, interfacing pays for itself.
Interfacing as a New Skill
Whether you choose to interface your next project or not, learning how to interface is a great way to level up in your crafting.
Understanding how fabrics play off one another, and how they rely on other fabrics for their shape and structure, is a great way to further your craft.
Nonetheless, should you ever need a quick, cheap way to make your garments sturdier and look great, fusible interfacing will always be there for you.
Do you have any tips for interfacing sewing?