
Aprons have been around for hundreds of years, but have most notably been recorded in use during the Middle Ages and beyond.
In the United States, aprons have been leveraged as part of ceremonies and every-day work attire, and are made out of everything from silk to flour sacks.
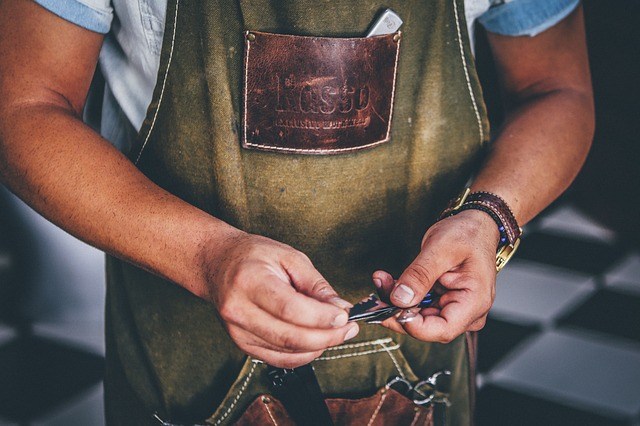
People working in the home or kitchen might use an apron to protect their clothing during chores both inside and out, while people working in factories might have a heavier apron made of leather or other sturdy materials to protect from the tools they’re using.
Whatever job you’re about to make an apron for, choosing the right apron pattern and style is a must, and knowing how to make an apron can mean the difference between spending tons of money on a pre-made style or enjoying the patterns you can play with when sewing your own!
On your journey to choosing the right apron sewing pattern for the job, you’ll want to consider a few things, such as:
Apron Sewing Patterns
Learning how to sew an apron begins first with choosing the style you want.
If you’re new to the idea and want to know how to sew an apron for beginners specifically, there are a few styles that are easier than others.
Bib Apron
Not surprisingly, the bib apron is both the most popular and the simplest to make. What comprises a bib apron is a loop that sits over the neck, as well as a length of fabric used to tie at the back.
This style is also known as the chef’s apron or the barbecue apron and is more than likely to be the choice for everyday household needs.
Tabard Apron
The tabard apron or cobbler apron is not unlike the bib apron, except that it tends to cover both the front and the back of the wearer, and is more popular in the United Kingdom than it is in the United States.
Cobbler aprons are among the easiest to make, though of course take more time according to the added material needed.
Pinafore Apron
The pinafore apron was more a sleeveless dress than it was an apron, although it was used for much the same thing.
It has fallen out of mainstream style and is considered a little more difficult to sew for a beginner, but it is a fashionable apron if you ever find yourself brave enough to tackle the pattern.
Fabric for Sewing Aprons
This section is short and sweet, as there are loads of fabrics to choose from – and guess what? You can use almost any of them!
When choosing a material, go with whatever color you like and consider what time of year you’ll be wearing it (something thinner in the summer than in the winter, perhaps?), as well as what it will be used for.
Making an apron to wear in the shop? Consider leather! The kitchen? Cotton or some other light fabric might be best.
How to Sew An Apron
In order to sew a simple, home-made bib apron, you’ll need one yard of fabric of your choosing, scissors, thread that matches your fabric, a pencil or tailor’s chalk, a cloth tape measure, and either a sewing machine or the hand sewing skills to make up for not having one.
First, cut your fabric to 27 inches long x 20 inches wide. After doing so, fold the fabric long-ways with the ‘wrong’ side up.
(As a side note, you’ll also need three long strips of fabric: one that is 18 inches for the neck, and two that are at least 25 inches for the straps that will tie at your back.)
Second, place the top of the fold to your left, and measure over from that fold four inches at the top (this will give you an eight-inch top of your apron when unfolded).
Third, head to the bottom right edge (the edges of the original fold) and make a mark 18 inches up from that bottom corner.
Fourth, connect the two marks using a curved line. This curve will be the part of the apron that rests under your arm, for reference.

Fifth, cut along that line through both pieces of fabric. Voila! You have created the basic shape needed for your apron!
Sixth, you can either leave the raw edges for a stylish, DIY look, or fold over each edge to create a hem that will then need to be stitched.
Seventh, and lastly, it’s time to attach your straps. For the waist ties, attach the two 20-inch lengths to either lower edge of the cut you made. This will allow you to tie your apron at the back.
For the neck, simply head to the upper, shorter edges at the top of your apron and attach them at the corners to create a loop. This loop will rest around your neck.
Here’s a video showing how to sew an apron for a workshop.
You’ve done it! If you like, you can go on to add small pockets at the front of your apron, or try out different fabrics and styles the next time you find yourself in need of a quick and easy apron no matter what job you’re working on!
Do you have any tips on how to sew an apron for beginners?