
Wondering how to slip stitch?
The slip stitch (abbreviated sl st in any documents you might encounter) is not so much a working stitch as it is a means to connect two pieces of fabric, hide a hem or edge, move yarn to another area of your piece, and to finish your stitch altogether.
It is sometimes referred to as a utility or finishing stitch and is unique in that it is almost exclusively a hand-stitched technique in both hand-sewing and crocheting, rather than a machine-generated stitch.
In this guide, you’ll learn how to do a slip stitch in a crocheting pattern.
How To Use a Slip Stitch in Crocheting
In crocheting, a slip stitch is considered the flattest and shortest stitch technique you can use.
It can be leveraged to both move yarn across a row of stitches or to join a new ball of yarn into your piece, and can also be used to create a round shape to your piece (such as with a cap or hat).
There are a variety of ways to use a slip stitch while working with yarn and other knitting materials, and here listed are just a few.
First, though, you’ll want to know some of the other basics of crocheting, such as chains and rows.
Further reading: Our complete guide to crochet edging.
Chains
Crocheting usually begins with what’s called a foundation or beginning chain. This is more or less a length of loops called slip knots that will act as the basic building block to whatever piece you’re trying to complete.
It is an incredibly simple stitch, created by bringing a length of yarn away from the ball you’re working with to the tune of about twelve inches.
In the middle of these twelve inches, at the six-inch mark, you can create a simple loop and push your crocheting hook through it.
With your crocheting hook inside of the loop, point the hook towards the length of yarn leading to the ball, and hook a piece of it. Simple, right?
Now, just pull the hooked piece of yarn through the loop and you’ve created your first knot, which you can tighten by gently pulling on the loose end (the opposite of the length of yarn leading to the ball), while leaving your crocheting hook within.
You will want the loop around the tool to be fairly tight, but just loose enough that you can slide your hook back and forth without too much resistance.
In order to continue your foundation chain and move closer to using the coveted slip stitch, you’ll want to repeat this process through the new loop until you have a long length of these loops now called a chain.
Rows
In crocheting, a row is just a length of chain on top of another. Starting from the bottom (or foundation) chain, it would be named row one, two, three, and so forth until you have the desired number of rows to complement whatever it is you’re making.
Creating a row is fairly simple. Once you have created a chain to your desired length, simply disengage from your loose yarn and instead guide your crochet hook back through the second to last chain.
This will make it briefly appear as though you have three loops around your crochet hook. Then draw yarn using your hook through that chain that you went under the first time.
Now, it should appear that you have two loops upon your crochet hook. Draw a piece of yarn through both (both, this time, not just the first!) loops, ending up with one loop around your crochet hook, and repeat the process through the next V or piece of chain.
Once you get to the opposite end of your chain, you have your first completed row and the foundation you need to create a slip stitch!
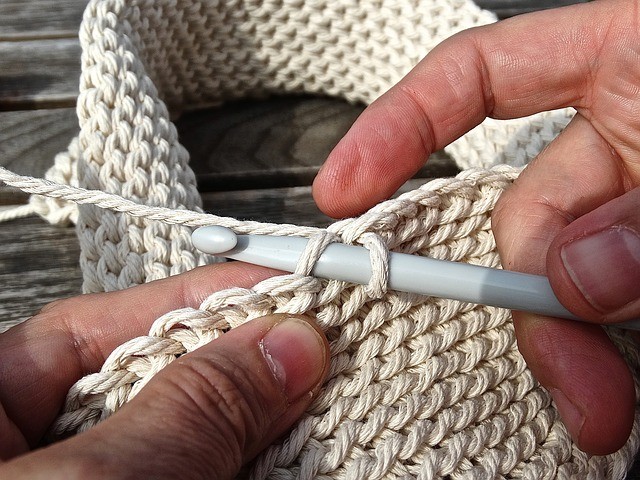
Creating Your Slip Stitch
Creating a slip stitch at this point is incredibly simple, and in the case of crocheting can allow you to move yarn across the row of your piece without creating more length.
Simply turn your work when you are at the end of your row, and instead of starting a new row, simply pull a length of yarn through your loop just like you had begun your very first foundation chain.
You have your very first slip stitch, and can now push your hook through just one piece of your chain and pull a length through just that first piece.
With two loops on your hook, pull a length through both and create your next slip stitch. By repeating this process, you will return to the other end of your row without giving length to your piece.
See this useful video for some handy tips.
Use a Slip Stitch to Join a Chain Into a Circle
Starting with just your foundation chain, you can use a slip stitch to create a circle.
In order to do so, simply push your hook with your one loop on its back through the very first piece of the chain near your slip knot.
Pull a piece of yarn through the two (it will look like three) loops you have on your hook, and voila! You have joined one end of your chain to the other.
Here’s a video showing more details on how to slip stitch.
Final Thoughts on How to Slip Stitch
Now, you have the basics of slip stitch sewing down.
By practicing this useful and versatile technique, you can move on to more advanced projects – and can even use this stitch in hand-sewing!
It’s excellent on garments and other pieces to do things like hide hems or create bigger and more beautiful patterns.