
Whether you’re sewing or embroidering, the textile arts require a lot of patience. If you’re new to these crafts, you may feel intimidated by the amount of time and effort each project will require.
Thankfully, there are stitches which can make your life easier!
The blanket stitch is perhaps the most beginner-friendly stitch out there.
Wondering how to do a blanket stitch? Or when to use one?
It’s a wildly versatile choice, and can be found in appliques, embroidery, and many finished edges. While confusing to learn at first, once mastered, it’s a straightforward stitch that you can leverage in no time.
What’s more, it’s both beautiful and secure!
So, how exactly do you make a blanket stitch, and where can you use it? Let’s take a look!
What Is The Blanket Stitch?
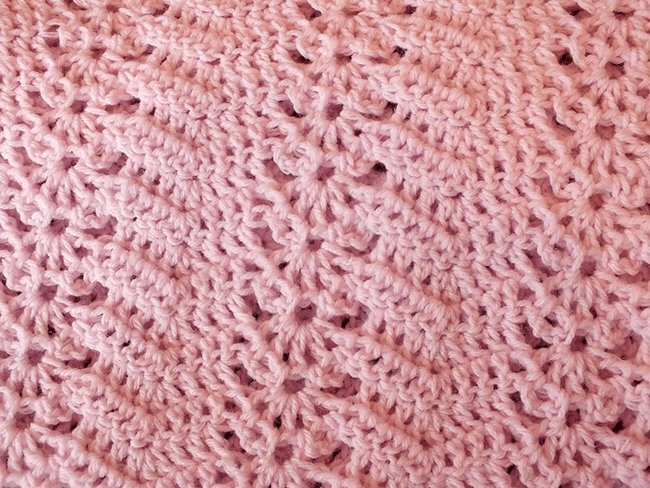
Also known as the cable stitch or crochet stitch, the blanket stitch is a type of finishing technique. As the name implies, it’s most commonly used to finish the edges of a blanket.
The blanket stitch will gently close and tie in the edge of your fabric, with straight stitches attaching it to the fabric itself. These stitches will look similar on the front and back, giving it a very clean, tidy appearance.
While simple in nature, the blanket stitch has many variations.
One of the most common includes the narrow blanket stitch, wherein the inner straight stitches meet together to form a V.
Another twist on this method is the whipstitch, wherein the inner straight stitches are instead completed diagonally.
Notably, the whipstitch is typically the style chosen for surgical suturing, as it’s very tight and difficult to undo.
Origin of the Blanket Stitch
The blanket stitch is an old method that has many uses; in fact, Indigenous American cultures use blanket stitches to sew together leather pieces, as well as to weave basket rims. In our modern day, the blanket stitch is most commonly used as a finishing stitch, a crochet stitch, and an embroidery stitch.
In 1877, the blanket stitch was finally brought to the sewing machine by the Merrow Machine Company. The machine’s design evolved as the years progressed, so, eventually, more and more sewing machines could create the blanket stitch.
The blanket stitch is a great technique for beginners. Aside from being a fast, tidy stitch, it’s also very forgiving of mistakes. It can be easily unpicked, leaving just one prick hole per stitch. As a plus, it’s a fundamental stitch, ensuring that, once it’s mastered, you can tackle a wide range of new projects that require a clean finish.
When to Use the Blanket Stitch
As mentioned, the blanket stitch is an easy method with several uses.
Most commonly, it’s chosen for finishing edges, especially in blankets. Closing off and securing the edges of a blanket can be tricky, as the final product is usually exposed to more wear and tear, washing, and stretching. The blanket stitch solves all of these problems by safeguarding the blanket against fraying – in a tidy, durable fashion.
Aside from that, a blanket stitch can easily and securely attach appliques to fabric. If you don’t want decals peeling up or coming loose in the wash, a quick series of blanket stitches will keep it steadfast.
Likewise, it’s a versatile embroidery stitch, often used as a decorative border.
As a crochet stitch, the blanket stitch can be used to attach two pieces of fabric together.
Further reading: See our guide to crochet edging.
So, when is it best used?
Whenever you’re dealing with edges!
Whether you’re finishing them, sewing them to other fabrics, or connecting one fabric to another, the blanket stitch has your back. If you want to add more embroidery stitches to your arsenal, this is a handy method to learn, and can be applied no matter where your crafting ventures take you.
Suitable Fabrics For Blanket Stitching
With that kind of versatility in mind, we have good news: this stitch also accommodates any type of fabric!
Just be sure to adjust your thread and needle accordingly, and make sure that you coordinate your thread’s color with the fabric’s color.
How To Do A Blanket Stitch
Now it’s time to learn how to blanket stitch.
It’s a simple technique, but it may take a little practice.
- Begin your first stitch from one end of the edge. Either edge will work; this stitch will work from left to right or right to left. If you’re sewing two pieces of fabric together, poke your needle from under one piece of the fabric to hide the knot. The knot should then be in the middle of both fabrics. This first stitch should be about ¼ inch from the edge. Alternatively, you could also adjust this according to how long you want your stitches to be.
- Now take the thread around the fabric and enter again from the first spot.
- Before pulling the thread taut, bring it through the loop you just created. Go from either left to right or right to left, depending on the placement of your first stitch.
- Pull the thread taut, tightening the first stitch.
- For the second stitch, enter again from the back, with the same distance from the edge as the first stitch. This second stitch should be about a ¼ inch to the right or to the left of your first stitch, depending on the direction of your needle in Step 4.
- Before pulling the thread all the way through, bring it through the loop you just created, from the front to the back. Then pull the thread taut.
- Continue making stitches until you finish the edge.
- To finish the row of stitches, bring the thread to the back and insert your needle through the loop of the last stitch you made.
- This should create a loop; bring the needle through this loop, going against the direction of the stitches. Pull to tighten. You can double this knot to make it extra durable, and then clip the excess thread.
Blanket Stitching Folded Edges
Blanket stitches are also great for folded edges. They hide a folded edge well, making it both clean and functional.
Creating a blanket stitch along a folded edge is similar to the steps above.
You can hide the knot by starting the stitch underneath the folded fabric. Then, create stitches as deep as the fold. Enclose the fold inside and try to make the stitches an equal length, so it looks as clean as possible.
Attaching Appliques
Aside from tidying up blanket edges, this stitch is ideal for attaching appliques.
Not only do they provide a fun, crafty feel, but the blanket stitch also ensures that your appliques are secured firmly onto your fabrics.
When done by hand, you’ll follow similar steps to those described above.
However, if you’d prefer to save time and create a more professional seam, you can always leverage a sewing machine (see our top rated sewing machines here). Most brands will offer a particular setting that makes it hands-free, or you can guide the machine along and judge it by sight.
To make a blanket stitch using a sewing machine, do the following:
- Position your applique on your fabric of choice. You may need to complete a few passes to adjust the stitches before obtaining the right length for each. When adjusting your stitches, you can use the edge of your applique as a guide. Just place the edge of the material flush against the inner edge of your sewing machine’s foot, and adjust the length of your stitches accordingly.
- Continue stitching the edge of the applique. When dealing with curved edges, make sure that your fabric is positioned with the inner stitch-points facing where you please.
- When turning an edge, make sure to turn your fabric while the needle is still poked through the edge. Otherwise, you risk the edges not being an equal distance from each other.
Blanket Stitch Embroidery
Other than finishing edges and attaching appliques, you can also use the blanket stitch in decorative embroidery.
In this craft, however, you’re not limited to one or two variants. Instead, there’s a great range of techniques to explore – all depending on the type of embroidery you want to make.
Because it’s versatile as an embroidery stitch, the blanket stitch is great for those new to this craft. Just one stitch can let you make countless different shapes, as well as add a quick and easy flourish to nearly any fabric. As a plus, if you find one style too difficult, you can always try out another.
Here are a few variations that can add flourish to your embroidery.
- Uneven Blanket Stitch
As the name implies, this blanket stitch uses lengths that are uneven. Long and short blanket stitches are use alternatively – with the shorter stitches at half the length of the longer stitches. Traditionally, the lengths of both would be consistent. You can play with the lengths of these stitches to create even less traditional designs.
To create an uneven blanket stitch, simply stitch as you would with a traditional blanket stitch. Just change the lengths as you go! This makes it great for beginners, who may struggle to keep track of the pattern or who dislike the need for added precision.
- Pinwheels
If you want decorative flare, try creating pinwheels by stitching around a fixed point. You’ll begin with straight stitches and create a circle, with all points meeting at the center – resulting in a pinwheel or flower. This is a great alternative for simple flower shapes, adding flourish to any project.
To create a pinwheel:
- Begin the first stitch like you would a normal blanket stitch. Be sure this initial stitch is where the center of the pinwheel should be.
- Then, create the next outer stitch diagonally, following the outline of a circle.
- Create the next inner stitch so that it touches the end of your first inner stitch.
- Continue following the outline of the circle until you reach the first stitch.
Then you’re done!
- Crossed
Like its name implies, the crossed blanket stitch creates an X shape on the inner straight stitches. Upon closer inspection, this X shape is made by alternating between a diagonal stitch and a straight stitch; the diagonal stitch overlaps the straight stitch, creating an X.
To make this crossed stitch, begin like you would with a normal blanket stitch. When applying the second stitch, go diagonally instead of straight, ensuring the new stitch begins on the side of the first stitch.
- Whipped
The whipped blanket stitch is both eye-catching and easy to make. It’s made by changing the thread color of the outer edges, so they’re different from the inner edges. The effect is a slight highlight on the outer stitches, without really changing how the basic stitch is made. That’s much like a whipped dessert, with the color growing fainter as it’s spread away from the core.
- To create this whipped version, start with the first stitch.
- Before creating the second stitch, enter the needle of the second thread in the same hole you just poked through.
- Then, twist both threads until they’re intertwined once.
- Drop the second thread and continue making the outer stitches with the first thread as usual.
- Continue the blanket stitch, making sure to insert the second thread whenever you are stitching the outer edges.
It may be more time-consuming, but the result is a stylish gradient spread throughout your project.
- Boxed Blanket Stitch
As the name suggests, the boxed blanket stitch is just a blanket stitch paired with a running stitch, designed to close off the inner stitches and create boxes. This is great for developing easy borders.
To get started, perform a normal blanket stitch. Then, close off the inner stitches with a running stitch. You can double over the running stitch, creating a backstitch, to close off all the boxes. This will provide you with a fully closed border!
Final Thoughts on the Blanket Stitch
Easy, clean, secure, and stylish, the blanket stitch is great for beginners.
As a plus, its versatility makes it relevant for both old-style crafts and new, modern takes. By adding it to your sewing arsenal, you’ll ensure your projects are sturdy, professional, and have extra flare.