
Many embroidery machines come with hundreds of built-in designs that you can choose to work with straight away but if you are still on the hunt for more there are many websites out there that can provide free embroidery designs for you to build your skill.
Also, many beginners don’t really want to be investing in that many embroidery accessories or tools if they are not even sure that they are going to stick with it. Being able to download free embroidery designs cuts out this financial stress and gives you the freedom to experiment with what styles you like.
Also, there’s a chance that the built-in designs that come with your embroidery machine are not to your particular liking so having access to many more designs online allow you to create art that means something to you.
Welcome to the world of digitized embroidery!
- What Is Digitized Embroidery?
- How Does A Digitized Embroidery File Work?
- Best Free Machine Embroidery Designs
- Embroidery Designs
- Oma’s Place
- Creative Fabrica
- Embroideres
- Oregon Patchworks
- Ann The Gran
- Kreative Kiwi Embroidery
- Bunnycup Embroidery
- SWAK Embroidery
- Daily Embroidery
- Embroider This!
- Buyer’s Guide
- What Makes A Good Embroidery Design?
- Downloading And Importing Embroidery Designs
- Making Your Own Embroidery Designs
- Frequently Asked Questions
What Is Digitized Embroidery?
Embroidery has been around since the 5th century so it has had a lot of time to establish multiple styles and techniques. It can be overwhelming, to begin with when you are looking for embroidery designs but you shouldn’t have to worry too much about it until you delve deeper into the world of embroidery.
If you are primarily getting your designs online or making them yourself on embroidery software then the main thing you need to understand is the fundamentals of digitized embroidery which is the process of changing a file such as one that you have downloaded on one of the following sites, into a sequence of instructions for the embroidery machine to follow.
Once it has been explained, you will see how digitized embroidery is a form of art and can take a long time to master which is why having access to thousands of free embroidery designs online is such a gift.
See also: the best embroidery machines for beginners.
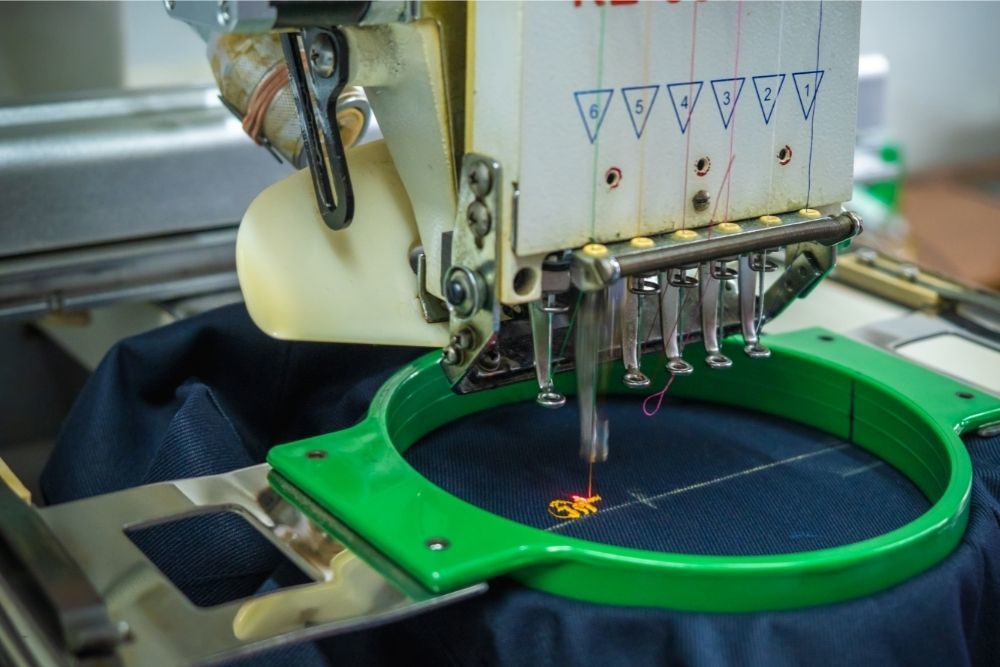
How Does A Digitized Embroidery File Work?
Underlay is the stitching in the design that is done first and is used to hold the fabric to the backing. The backing is a piece of material that is hooped and acts like a stabilizer which stops the fabric from stretching or puckering throughout the embroidery process.
Once this is done, the digitizer thinks of a path for the embroidery to follow which then tells the embroidery machine where to begin and when to end the design.
This step is also when the digitized file explains the order in which each part of the design is to be embroidered, such as filling the design and then the border over the edge. If it did not do this, the design would look wrong when it’s finished which leads to pull compensation.
Pull compensation is how the different fabric types are compensated by the embroidery. Some fabrics such as leather and cotton do not stretch but other fabrics like polyester do. By adjusting the pull compensation, it lets you sew a design across different fabrics.
If you didn’t have a pull compensation then you would have to stick to a specific group of fabrics which is limiting when you want to be creative and experiment.
Finally, let’s get into stitch types. A digitized embroidery file will have instructions as to what stitch type to use in the design. There are three main types of embroidery stitch, satin, run, and fill.
A satin stitch is a common one and is used mostly for text, thick borders, details and can be used to give designs a neat edge. A run stitch is where embroidery gets its incredible level of detail from, it ducks in and out of the fabric and is used for tiny, detailed parts, thin borders, and text.
Fill stitch is used to cover large areas and is tightly compacted. There are different variations of fill stitch and can be used to make patterns in embroidery designs by sewing the thread in different directions.
Now that we know how it works, these are the best sites to go to where you can see digitized embroidery in all its glory.
Best Free Machine Embroidery Designs
Embroidery Designs
This site does what it says on the tin and gives you access to thousands of free designs. All you have to do in order to download a design is to make a free account, and then you can go ahead and download your design.
Each design has butterflies beside them that go up to five and act as a review system and a comment section that users can use to provide feedback. This is a great way to filter out the designs that are of lower quality or don’t transfer so well onto fabric which saves you time and thread.
As well as free design downloads, you can also purchase designs, software, threads, stabilizers, and more.
The way that the website works is that you are allowed you download three designs a week, and if you make a purchase of more than $35 you can download six free designs a week which can then be increased to nine purchases a week when you spend $75 or more.
You can also create a wishlist where you can save all the designs you are interested in that can be downloaded in the future.
Pros:
- Review system – other artists can point you in the right direction of what designs are best
- Big selection – the collection of free embroidery designs reaches into the thousands
Cons:
- Limited downloads – you are limited to three free downloads a week
Oma’s Place
The designs from Oma’s Place have gone through detailed steps to ensure they deliver their best. New designs are first sketched out and digitized before they are sent out to four or five testers who send back reports and photos and point out any changes that need to be made.
With all the time and care that goes into the designs on this site, you can see why it is included in this list.
The site has a very neat layout, and it is easy to navigate through its big collection of embroidery designs. If you sign up for the monthly newsletter, it will keep you updated with design recommendations and supply you with a free design every month.
The site also has a page dedicated to tutorials on embroidery in both video and downloadable PDF form.
Pros:
- Monthly newsletter – updates you on the site and designs and gives you a free design with every issue
- High-quality designs – they go through testers before being added to the site which makes sure they all are of a high standard
Cons:
- Limited free designs – they have a good amount but not as much as other sites
Creative Fabrica
Creative Fabrica will send you a free design every week if you sign up to their email which is a great deal.
You can also use these designs to sell as they come with a commercial license, so if you are getting started with a small business you would be able to build up some traction with customers thanks to these attractive embroidery designs.
You may find yourself scrolling through their free designs as they have an impressive 50,000 designs on the site for you to choose from.
There is an option to set up an unlimited account for $29 a month that gives you access to everything on the site which will keep you going for a long time. If you do not fancy spending this much money every month, Creative Fabrica offers other plans that are cheaper but include less content.
Pros:
- Subscription surface – provides you access to everything for a price of $29 a month
- Commercial license – this gives you the legal permission to sell their designs
- Weekly free design – included in their weekly email subscription service
Cons:
- Expensive bundles – they do have plans that are cheaper than $29 but still cost about the same as a Netflix subscription so you would have to be using a lot of their content to make it worth it if you have a low budget
Embroideres
To get started with this site, you don’t have to register for an account or give any personal information which makes it quick and easy to get downloading your designs. They have an extensive collection and you are not limited to the number of free designs you can download at any time.
It’s not difficult to look through this big selection of free designs though because the site has a search bar that will narrow the designs down to categories and themes. It also has a review system that will help you make informed decisions about the designs you download.
Pros:
- Unlimited free downloads – you can download as many designs as you want at any time
- Review system – anyone can upload their design, so the review system helps you avoid ones with lower quality or issues
- No registration – you do not have to make an account and input personal information
Cons:
- Website interface – the site is not attractive and can be a bit clunky when you are first figuring out how to navigate it
Oregon Patchworks
Oregon Patchworks has figured out a good way to create the incentive to keep using their website because if you buy their designs, it unlocks more free embroidery patterns. However, if you want to download free designs, there is a limit to 10 downloads every 24 hours which is not too bad but is still restricting.
If you feel there are not enough free designs for you, you can become a member which gives you the ability to access a members-only area of the site that has more free designs but you must subscribe to their newsletter beforehand that includes a free design download every Friday.
Pros:
- Large selection – they have a lot of free and purchasable designs to choose from
- Member feature – becoming a member gives you access to more free designs
Cons:
- Download limit – you are limited to 10 downloads every 24 hours which can be frustrating
Ann The Gran
When you create an account with Ann the Gran, you immediately get access to a free week of club membership which lets you access 100 free designs. After the trial and you have decided you want to pay for the subscription, you get unlimited access to the membership club’s free designs as well as other bonuses.
You initially get three free designs a week which can increase to six a week when you spend $35 or more and then if you spend over $75 you can get nine free designs a week. Ann the Gran gives you the ability to sell a limited number of things with their designs stitched on but you are not allowed to sell the designs as are.
Pros:
- Free trial – you get a week free trial which gives you access to 100 free designs
- Item distribution – can sell items that have their designs stitched on
Cons:
- Limited free designs – have three free designs a week and have to pay to increase it
Kreative Kiwi Embroidery
This site has a lot of options of embroidery designs to choose from and you can get access to 100 more by subscribing.
Kreative Kiwi Embroidery has more embroidery patterns than they do embroidery designs. Patterns are usually used in traditional embroidery called ‘in the hoop’ which basically means that the whole item is made using the hoop such as a bag or a mugrug.
This is different from embroidery designs as they are usually used for embroidery machines to stitch onto items. Not everyone wants to use embroidery machines so this website is a great gem for those who want to do traditional embroidery with a hoop.
Pros:
- Unique selection – specializes in embroidery patterns instead of designs
- Subscription – if you join Kreative Kiwi Embroidery, you get access to 100 more free designs
Cons:
- Lack of designs – the fact that they focus more on patterns than designs may also be a con for those with embroidery machines and are looking for designs only
Bunnycup Embroidery
If you have a child or know someone with a child then you should head over to Bunnycup Embroidery ASAP as it will be hard to find any site that has a big range of designs that are so cute. If you are looking for more from Bunnycup Embroidery, you can sign up for their email that sends you a free design every week.
As well as designs, they also have a big selection of fonts, redwork, and an extensive collection of appliques. Another good thing about this site is that you do not have to make an account in order to download any of their free designs but you do have to register if you want to purchase from them.
Pros:
- Cute style – the style of their designs are perfect for infants and would make good gifts
- Applique collection – extensive applique collection that other sites don’t offer
Cons:
- Design quality – some of their earlier designs are not as good quality as they are now
SWAK Embroidery
SWAK Embroidery is another site that has a lot of cute designs perfect for using to make gifts for infants. The designs are more simple than other sites and cater more toward boys but that is down to preference.
The free designs are updated regularly, and you are allowed to sell items with their designs stitched on in limited qualities. There is a tutorial section of the website that has many tutorials to help you with projects and has step-by-step pictures to make it easy to follow.
Additionally, they have a lot of blackwork embroidery files which is a type of embroidery that is generally done in black thread.
This technique works really well with making intricate designs such as geometric patterns, maps, and chessboards. They have a lot of free designs to choose from and even more that you can purchase.
Pros:
- Lots of blackwork – they have lots of blackwork designs for free download which other sites do not have as much of
- Detailed tutorials – tutorial sections with detailed guides on a range of embroidery projects
Cons:
- Website interface – it doesn’t affect the designs but the site looks dated and can be off-putting when you are looking for free designs
Daily Embroidery
This site is a hot pot of designs with categories ranging from BBQ to recycling bins so if you go in with an open mind you will definitely find a design that you want to download.
You can download a free design every day, and if you forget, Daily Embroidery is kind enough to send you an email to remind you. You can have access to all of their designs if you join the club membership for $9 a month.
In this deal, you also get two new designs every day and permission for commercial use which lets you sell items that have Daily Embroidery designs stitched onto them.
Pros:
- Large range of designs – all designs are original and unique
- Subscription service – $9 monthly payment for all access and other bonuses is cheaper than other embroidery design sites
Cons:
- Register account – you have to register to be able to download any free designs which might put some people off who don’t like to give out personal information for free services
Embroider This!
Embroider This! Offers over 200 free embroidery designs that you can download and gives permission to sell items that you have stitched their designs on in small quantities but you are not allowed to sell the designs as they are.
They offer embroidery blanks which are clothing and accessories suitable to be stitched on, and they sell embroidery supplies.
You can navigate through this site and download designs without having to make an account and sharing your personal information but you can sign up for their free newsletter if you want to find out more about them.
The downloads are very accessible as they are in zipped folders with the design in different machine formats, a picture file, and a color chart.
A picture file lets you organize your downloaded design files by thumbnail, and a color chart is useful because it ensures that colors stay consistent as you find the right thread to represent each color.
Buyer’s Guide
What Makes A Good Embroidery Design?
The first thing you want to do when you are on the hunt for an embroidery design online is check that it is not too big for your hoop. Most beginner embroidery machines have a hoop that is 4” X 4” large which is on the smaller side for hoops and will not be able to fit bigger designs.
When you have a small hoop, it can take a lot of time to rehoop and adjust whenever you want to move on to the next section, and this is when mistakes can happen too. So, it’s best to stick to designs that will fit nicely inside of your hoop.
However, you can get software that you can use to split large designs into smaller ones. If you have a hoop that is 5” X7” large then you will be able to download larger designs, the sites should let you know the dimensions of the design which makes it easy once you know what to look for.
If the design looks odd with a lot of jump stitches, high stitch density, or doesn’t look the same on fabric as it does on the screen then there is a good chance that it has been auto-digitized. To make sure that it is a good quality design, check the user reviews if the site has one and test it on a bit of scrap fabric.
Some sites are extra helpful and include a color chart in the download folder of the design, they are really good for making sure you use the correct color of thread. Also, some a thread chart that contains the stitch count, list of thread changes, and digitized size.
Downloading And Importing Embroidery Designs
Luckily, it is easy to download designs from the website to use on your embroidery device. The first thing you have to do is find a design and if you continue reading this guide, you will know the best places to find them.
Once you have found the design you want to use, most sites will have a cart feature that you can add the design to and check out, but if not, there will be another prompt to follow that will download the design.
When you see the downloaded design in your downloads on your computer, it will be in a zip folder that needs to be clicked on to expand all of its contents. The reason why it is in a zip folder is that different embroidery machines support different file types.
If you scroll through the contents of the zip folder you should come across the type that is compatible with your embroidery machine. If you are not sure what one that is, you should be able to find out by reading the user manual or looking online, and it is worth doing because if you import the wrong file type it will not work because your machine won’t be able to understand it.
The next step is to get your USB stick ready, it does not matter what brand or type the USB is as all it needs is enough space for your design. Then, simply plug it into the USB port of your computer and open it up.
Once you have opened the USB folder, you can drag and drop or copy and paste the correct design file into your USB folder. That was easy enough, now all you have to do is put it onto your embroidery machine so you can get going.
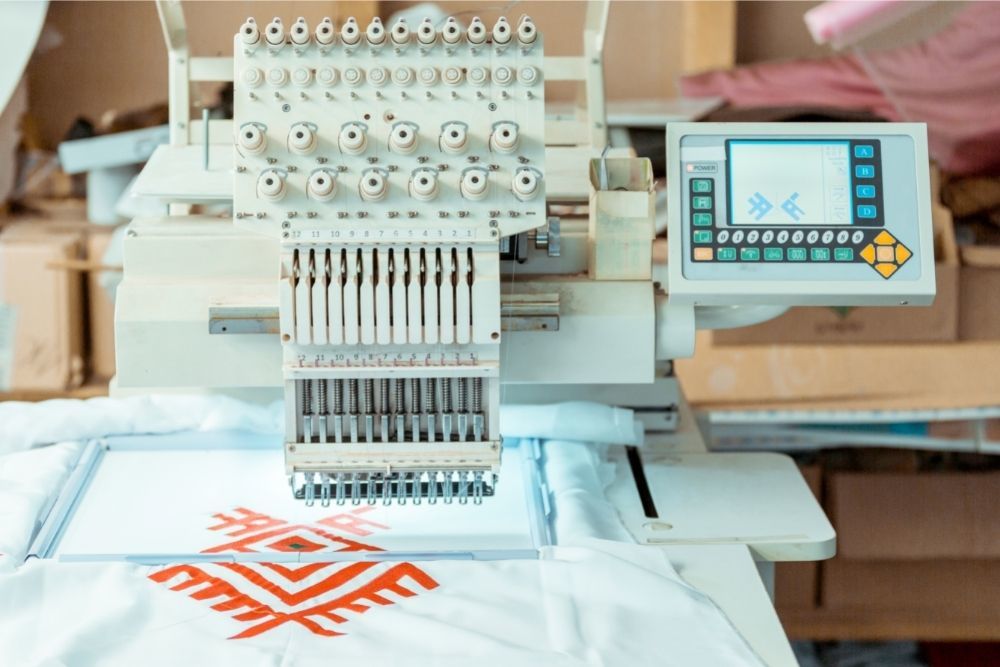
Embroidery machines usually have LCD touchscreens that you can use to access the files on the USB which makes this step much easier. Plug the USB into the port which is likely on the side of the screen and select the USB option on the screen to open it.
Finally, you just have to select the design you have downloaded onto the USB and you can get started.
This is how most embroidery machines work but some machines may require you to use a data sync chord that comes with some embroidery machines that you need to use to connect your computer and the embroidery machine which allows you to drag and drop designs from your computer to the machine.
Some embroidery machines have a memory that can usually hold about 15 designs at a time but if your machine does not have memory then you need to plug the USB in any time you want access to the designs.
Making Your Own Embroidery Designs
If you are feeling creative and have been inspired by other people’s embroidery designs, then why not have a go at designing your very own embroidery designs?
Embroidery software lets you create and edit your own designs directly on your computer. Once you have finished the design you can simply put it onto a USB and plug it into your embroidery machine which will then do the work for you.
By using digitizing software, it makes your designs more symmetrical and accurate as the software has guides and measurements you can use as you create your design.
Another benefit is speed, your embroidery machine is a computer and therefore does not make mistakes or hesitate with its movements which saves a lot of time and lets you create more designs in a shorter period. This is particularly beneficial for those who are running a small embroidery business.
Embroidery software may look daunting, but it’s fairly simple to use once you have found the right one that works for you, however, if you have a particularly good embroidery machine it may already have built-in software that you can use.
If your machine does not have software included, you can find a good selection of official software packages online, but make sure you get a licensed one to avoid any bugs or issues.
Having embroidery software lets you not only make your own designs, but edit them to great detail as well, but if you are only starting out with embroidery it would be a good idea to start with downloading premade designs first so that you are not thrown in at the deep end.
If your embroidery machine has a touchscreen, you can use it to edit designs by rotating, resizing, mirroring, and combining them with other designs. Some machines also let you change the colors used in the design.
The full-color LCD touchscreen also gives you a clear preview of your design before you stitch it which saves you from going through the effort of getting set up and beginning the stitch to only realize it doesn’t look how you wanted it to or the colors do not look like what they did on the website.
Frequently Asked Questions
How Do I Turn A Picture Into An Embroidery Design?
The first thing you have to do is pick a picture that you want to use, for best results pick one with enough details and broad outlines. If you are doing this for the first time, use a picture that is not too complicated and does not make it a large image as it might get too strenuous for the first one.
Also, do not use any copyrighted images.
There are two ways that you can do this next step, the first way is to manually trace it by hand. You will need a very thin piece of glass and a bright light for this method. Put the photograph on the glass and get a thin piece of white paper and place it on top.
To have a clear view of what you are doing, it’s best to have good lighting around you. Now you can begin to trace the outline of your photograph on the sheet of paper with a pencil. Try to trace as many lines as you can see and transfer the tracing onto the fabric of your choice with carbon paper.
The second method is easy even if it does involve an iron. As well as an iron, you will need peel off transfer sheets which allow you to transfer designs onto fabric. Use this transfer sheet to print the desired photo on and you will need the photo to be mirrored for the finished result to be the right way round.
This can be easily done in the computer settings or printer settings. The printer settings will also need to be accessed to change the settings to heavy paper before printing the photo onto the transfer sheet. Now, cut out the printed photo from the transfer sheet while keeping a narrow border all the way around.
Place the side of the transfer sheet with the photo onto a piece of washed fabric that is suitable for embroidery. Next, run an iron with medium heat over the back of the transfer sheet for 25 seconds but keep the iron moving the whole time without stopping as it will burn the paper if you do.
Leave the transfer sheet to cool for two to three minutes then gently peel off the back of the sheet so that it doesn’t tear. You should now be left with your photo transferred onto the fabric ready to be embroidered.
Once you have done either of these two methods, you can begin to embroider your photo and turn it into a beautiful design that can be stitched onto clothes, accessories or kept in the hoop to hang on a wall. You can embroider the photo by using free motion embroidery or by using an embroidery machine.
Get a medium-weight fabric and a stabilizer that will keep the fabric in the right place and will stop it from puckering as you work. Make sure that the fabric has been hooped with the stabilizer and is clear of wrinkles and folds.
You can begin embroidering with subtle shading and densely packed stitches, keeping in close reference to the original photo. Use a back stitch in a dark shade to outline the hard edges of the design before following the contours to fill the inside of the design.
You can also achieve a shading effect by combining different shades of similar colors.