
Headbands are a great and versatile accessory that can upgrade any wardrobe. From the fun and chic to the formal and elegant, headbands can be your best friend.
What’s even better, handmade headbands are an excellent project for those who are beginning to sew! Headbands require very minimal sewing, and you can use almost any fabric: from your favorite silken delight to an old t-shirt lying around.

For those who want to learn how to sew a headband, you’ve come to the right place. Where can you find the best patterns? What are some good reversible, athletic, or knitted headbands? What tools do you need?
We’ll discuss all that and more, so let’s dive in!
Where to Find Free Headband Patterns
Designing your headband pattern from scratch (or based on other patterns you’ve tried already) is an excellent exercise for beginner sewists.
Headbands are incredibly versatile, and you can make them as straightforward or as complex as you want. There are many patterns for various types, and different embellishments – like pins and ribbons – are a great way to shake things up!
For those who need help getting started, we have prepared a few patterns for you, right here. If you want to branch out, you can find more patterns online with a simple search.
DIY & Crafts is a great place to start and, for knitters, Stitch and Unwind has got you covered.
How to Sew or Braid a Headband
Sewing a headband is easier than it looks. As a plus, it’s also stylish and fun!
Here are some beginner-friendly guides for creating headbands that you’re sure to love (and use in any situation!).
Elastic Reversible Headband
For those who want something more secure, an elastic headband is certain to remain well-fitted to your head – even throughout the sweatiest days.
These are great for people who are very active, and they double as excellent workout headbands as well!
What’s more, this headband is reversible. If you feel sweaty, flip your headband to the other side until you get a shower! That way, you can keep trucking without having to pack a whole legion of headbands.
Materials
- Fold-over elastic.
- Fabric.
- Sewing machine.
- Scissors.
Method
- Cut out two headband pieces using the template. They should be 12 inches long, with 1.25 inches on one end and 2.5 inches on the other.
- Cut out ten inches of fold-over elastic.
- With the right-sides of the fabric together, fold down ¼ inch from the longer edge of your headband piece.
- Slide one end of the elastic into this fold, so that it sits between two fabric pieces, perpendicular to the edge. Pin the elastic in place, as well as the fabric.
- Now, we can begin sewing the edges. A sewing machine will make this process easier, but by-hand is also perfectly acceptable (just be careful not to shift the pins!). Start at the edge with the elastic jutting out. Make sure to secure the elastic. Then, sew both longer sides shut. Make sure to leave about two inches open on each side, and leave the other edge open.
- Now, pull the headband inside-out through the openings you left on the longer sides.
- Iron the headband flat.
- Measure the headband against your head to determine how long the elastic should be. Mark the length you need, ensuring you don’t add more than a ½-inch of leeway.
- Insert the other end of the elastic into the open end of the headband – about ½-inch deep.
- Topstitch this end, including the rest of the headband’s sides.
- Backstitch the ends with the elastic to secure it.
DIY Braided Workout Headband
While working-out is healthy for you, sometimes it’s just too difficult to tackle that workout machine. What’s even worse is when you’re in the middle of your warm-up routine, and your hair keeps getting in your face!
To keep your head in the game, why not make your headband? It’s a fact of life that scrunchies get lost—with this DIY workout headband, you can create as many as you want!
All you need is an old t-shirt, and there’s no sewing involved!
Materials
- A large, old t-shirt, preferably seamless.
- Scissors.
- Tape.
Method
- Cut off the bottom hem of your shirt. Set it aside (it can be used later!).
- Starting from the bottom, cut 5 horizontal strips, 1-inch wide. Try to make them straight, but they don’t have to be exact.
- Stretch each strip, and cut them in half. They should now be twice their original size.
- Gather the strands together. Line them up flush together, so they form a single unit. Wrap one end in tape, and then secure this end to a hard surface.
- Now we can begin braiding! Take the left-most strand and pull it one towards the right.
- Then, take the center strand and place it one position to the left.
- Take the right-most strand and place it one over the left.
- Take the middle strand, and place it one over the right.
- Now continue this pattern, repeating steps 5 to 8.
- You can continually measure the length of your braid against your head. Once you find a comfortable fit, trim the headband. Make sure to include a leeway of two inches over your desired length.
- Now, line up both ends so that each strand mostly aligns with a strand from the other end. Take a pair of strands towards the outside of the braid, and tie them together with a double knot.
- Making sure not to leave any strands unknotted! Tie together the rest of the strands with a double knot as well.
- Trim off the excess strands and remove the tape. Now you have your headband!
If you feel like making more headbands, chances are, your t-shirt has enough fabric for about two more pieces. If you need a larger collection, follow the instructions again to make more!
Here’s a video showing an example of how to make a braided handmade headband.
How to Knit a Headband
Headbands are great in the summer—but they’re even better in the winter! For your chilly season needs, enter knitted headbands!
This style doesn’t just keep hair out of your face; they’ great ear warmers as well. And, unlike hats, this won’t ruin your hairdo!
Basic Knitted Headband and Ear Warmer
Learning how to knit a headband or ear warmers are a great beginner project and can be finished in just a matter of hours – with a headband about 22 to 24 inches long.
This pattern for a knitted headband/ear-warmer combo requires only basic tools, so it’s cost-effective too!
Materials
- Knitting needles, size 6 or 8.
- Medium weight yarn, around one skein.
- Button.
Method
- First, cast on 7 stitches.
- Then, we’ll create a knit/purl rib pattern for 4 rows. For the first row, start with a knit, followed by purl, then knit, then purl, until the end of the row. For the second, start with a purl, then a knit, then a purl, and so on. Repeat this until you have 4 rows.
- After 4 rows, start increasing the stitches. We are going to add an increase every odd row; the first row with an increase should be the 5th (Every even row should follow the same rib pattern on the first 4 rows.) When done right, you will have two knits or two purls in a row at every other increase.
- Repeat the knit/purl rib pattern until the center stitch.
- When you reach the double knit or purl in the center, pick up the loop between stitch and stitch (with a knit or a purl) to continue the pattern.
- Then, finish off with another knit/purl rib pattern.
- Repeat steps 4 to 6 until you have a pattern about 4 inches across.
- When you’re about halfway to the desired length of your headband, you can begin to decrease the pattern. First, determine how long you have been stitching the 4-inch wide center. Finish the center by adding the same length.
- Start the first row of the decrease by repeating the pattern until the center stitch. Decrease by knitting or purling the center and the next stitch.
- Repeat the rib pattern, creating an even number of stitches (due to the double stitch in the center).
- Then, create a rib pattern across and towards the center. At the center, knit or purl the double stitches together.
- Then, create a rib pattern across, returning the pattern to an odd number of stitches.
- When you return to the bind off, leave one stitch on the needle. You can transfer this stitch to a crochet hook and create a chain.
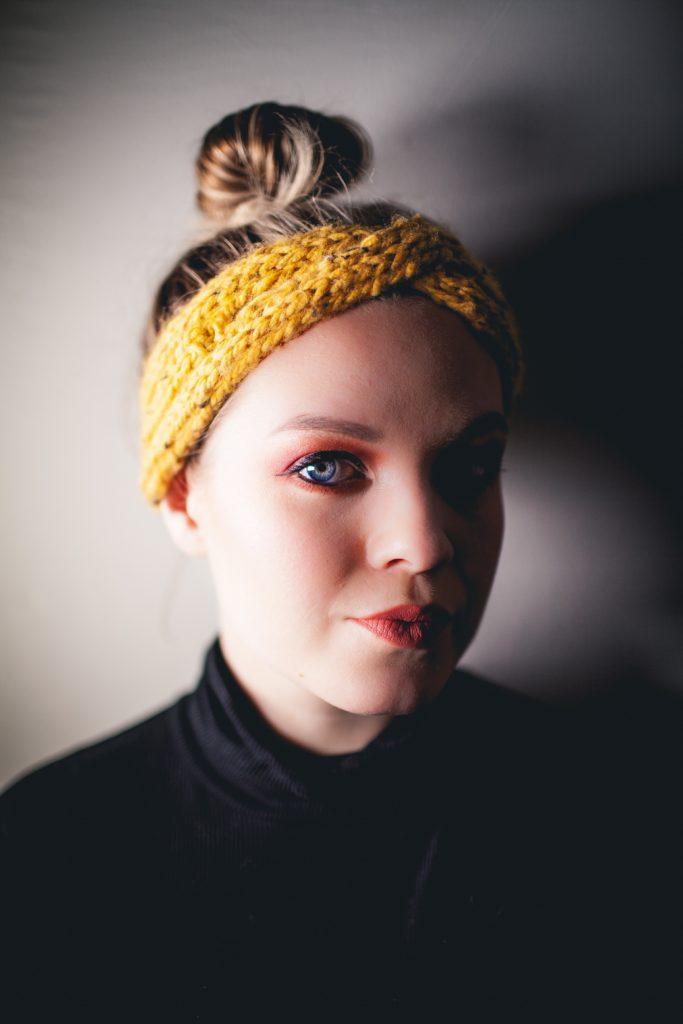
DIY Bow/Turban Headband
For those who want something more challenging, why not try this bow/turban headband pattern?
The different parts of this design add to its complexity, but it also allows you to mix and match the colors to suit your mood.
For even more versatility, this pattern can be made into two ways: either with a bow or just as a turban. For a more mature and subdued headband, keep it as a turban. For those who want a more fun and lively headband, you can add an adorable bow!
Materials
- 1 skein of yarn.
- 4mm needles.
- Tapestry needle (or crochet hook).

Method
- Begin by casting 15 stitches.
- Create a knit/purl ribbing pattern for 6 rows.
- For rows 7 to 26, use a seed stitch. A seed stitch is simply reversing a knit/purl pattern so that you knit your purls and purl your knits.
- For the 27th row, knit one, then yarn over. Continue using a seed stitch until the last stitch, then yarn over, and stitch one. At this point, you should have 2 more stitches than before.
- Keep using a seed stitch pattern for about 12 inches in length.
- Knit one. Then, knit two stitches together.
- Continue this pattern until you only have three stitches at the end. For these three stitches, knit two stitches together, then knit one.
- For the next 20 rows, create a seed stitch pattern.
- For the last 6 rows, create a knit/purl ribbing.
- Cast off all the stitches.
For those who would like to add a bow to your headband, you will need to knit the bow ring and the bow. For those who do not want to add a bow, you could skip steps 2 and 7.
- Ring cast 10 stitches.
- For 36 rows, use a seed stitch pattern. Cast off. This will be the ring that wraps around the bow, connecting it to the headband.
- Now to make the bow itself. Cast 15 stitches, and use a seed stitch pattern for 42 rows. Then cast off. If you do not want to add a bow, you could skip this step.
- Now to assemble the pieces! Take the headband and sew together the ends, making sure to hide the yarn ends. This provides it with a more finished appearance.
- Now, take the ring piece and place it across the ribbing of the headband, covering the seam. Join the ends of the ring piece behind the headband and sew it together.
- Once the ring piece is connected, sew the back of the ring piece onto the headband itself. Be sure to secure it well.
- For those who would like to add a bow, take the ends of the bow and tuck it inside the bow ring from the right side of the headband. It should fit snugly and be easily pulled off. This allows you to mix and match bows!
This video shows another example of how to knit a headband turban style.
Conclusion
Headbands are a beautiful, versatile accessory. They are a great addition to any outfit, no matter the occasion. On top of that, they’re excellent beginner projects for the newbie sewist or knitter!
Hopefully, these patterns have started you on your DIY headband journey. So, pick up your favorite fabric or yarn, and get creating!
What’s your favorite handmade headband pattern?