
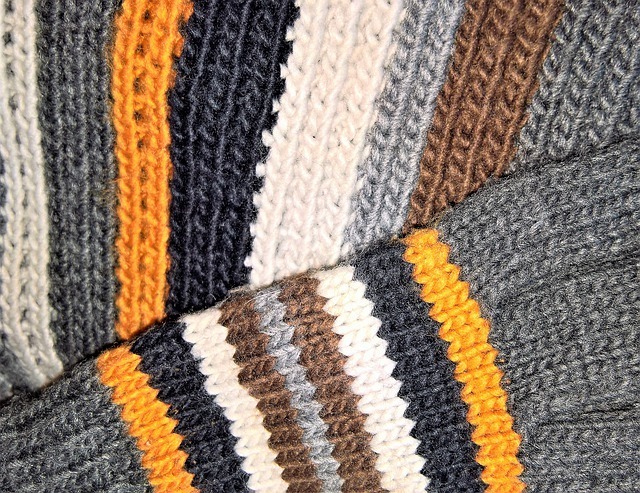
Gloves are one of the most overlooked aspects of a person’s attire, but they’re also one of the most important. They can add a subtle boost to any formal wear, or add dramatic flare to a casual outfit.
On top of that, gloves are as functional as they are aesthetically pleasing. You can easily stave off the chilly weather with soft felt gloves, or warm your hands in the fall with fingerless arm warmers.

For those who would like to customize their closet, there’s nothing quite like personalized gloves. But you don’t have to seek out a tailor – you can make them yourself!
While the design may be a touch complicated to understand, with the right tools and know-how, you can fill out your collection in no time.
Ready to make your own? Here’s everything you need to know.
Where to Find Glove Patterns
Unlike most articles of clothing, glove patterns tend to have very little variation between them. However, these small differences can be helpful in creating your own techniques!
Small changes are the trick to saving a bit of time and material.
Sewing Glove Patterns
Below, you’ll find example patterns to get you started on this fun project – but it won’t hurt to check out other patterns too!
For instance, patterns from Threads Magazine use a single piece for the body of the glove (unlike two pieces like most patterns).
This creates a tidy, finished look and saves on material. It also includes variations for bigger or smaller patterns.
Crochet Glove Patterns
If you do choose to crochet your gloves, instead of sewing them, you have more variation to play with. Because it’s easy to add embellishments to a crocheted piece, crocheted gloves can let you mix and match designs.
Like sewn glove patterns, you can find patterns for crocheted gloves online or in magazines. To start you off, here is a list of fingerless crocheted glove patterns on Stitch and Unwind, as well as The Spruce Crafts.
Parts of a Glove
When sewing gloves, a common mistake beginners make is ignoring the different parts of the garment.
It’s more than just a piece of cloth that goes around the hand; it is made of different pieces to fit the spaces of the hand, all while staying functional and comfortable. The glove is made of three main pieces.
Trank
The trank is the biggest piece of the glove. It is hand-shaped, or palm-shaped. In sewing patterns, the trank is often split into two pieces (one part for the back of the hand and the other for the palm), but it could also be one bigger piece.
Thumb
The thumb is a separate piece from the rest of the glove. It is often attached last.
Fourchette
The fourchette is the piece that covers the space between fingers.
Despite the fact that it’s often overlooked and forgotten, the fourchette provides comfort and functionality in the glove. The fourchette is attached between the front and back pieces of the trank.
Glove-makers will be familiar with more components, like quirks and the cuff. For sewists, however, these are the only parts that you will need to concern yourself with.
How to Sew a Pair of Gloves
Sewing a pair of gloves is a fun and easy project, but people often jump into it without an appropriate pattern.
Tracing your hand as a reference is a beginner mistake, and often leads to many failed attempts. While you can technically create a glove this way, they make for uncomfortable, often flimsy results.
Here’s the right approach:
Drafting the Pattern
Sewing a pair of gloves can be an easy project, but getting the measurements correct is tricky. Because hands possess so many components, the measurements for each pair of gloves can be different from each person.
Even when you have a well-made pattern, you may need to make a few adjustments to fit smaller or bigger hands.
More experienced sewists may know how to adjust for bigger or smaller patterns, but it helps beginners to draft the patterns yourself. Drafting a pattern can seem tedious, but it’s a great exercise for those who are new to sewing.
Easy Gloves Pattern
For those who would rather jump into a pre-made pattern, this tutorial from So Sew Easy has your back.
For this pattern, we have three size variations: small, medium, and large. Check out the different sizes here!
Materials
- ¼ to ½ yards of fleece.
- Thread.
- Jersey needle, size 12.
- Sewing machine.
Method
- Print the pattern in the size you want. Then, cut the pattern on your chosen fabric. The grain of your fabric should be parallel to the fingers and thumb; you will want the stretch to be across your hands.
- When cutting out the pieces, you should end up with seven pieces per glove, 14 pieces for a pair. There will be two pieces for the trunk, one for the fourchette, three for the thumb, and one for the cuff. When attaching the pieces, make sure to sew with a zig-zag stitch, then sew around again with a straight stitch. Keep a 1/8 inch seam allowance for every stitch.
- First, let’s attach the fourchette. Begin by sewing the strip around one piece of the trunk, making sure to sew on the wrong side of the fabric.
- Now for the thumb. Attach the three pieces together with a zig-zag stitch, followed by a straight stitch, making sure to stitch from the wrong side of the fabric. Turn the finished piece inside out. You will notice that your thumb piece will resemble a rounded, rectangular opening. From the tip of the thumb, one corner will be longer than the other.
- Take the trunk piece that you worked with earlier, and place it on your worktable, wrong-side up. Take the shorter end of the thumb piece (already turned inside-out) and line up the corners to the hole in the trunk. The shorter corner should be lined to the top of the hole, with the longer corner at the bottom. You may need to trim the edges so that it lines up better.
- Remove the thumbpiece. Now, align the edges of the thumb from the inside (the right side) of the trunk. from the wrong side of the trunk, pin both pieces in place. Sew these pieces together with a zig-zag stitch, followed by a straight stitch.
- Now it’s time for the ribbing. Fold the rectangular piece from left to right, so that you have a tube that is 10 inches long. Fold this tube in half, so that the seam allowances are inside the old.
- With the fabric pieces right-sides out, insert the gloves inside the ribbing, and pin. Sew using a ¼ inch seam allowance, first with a zig-zag stitch, followed by a straight stitch.
- Pull the bottom of the ribbing back up, and you have your gloves!
This video gives an example of how to sew gloves.
How to Crochet Gloves
If sewing isn’t up your alley, why not try crocheting?
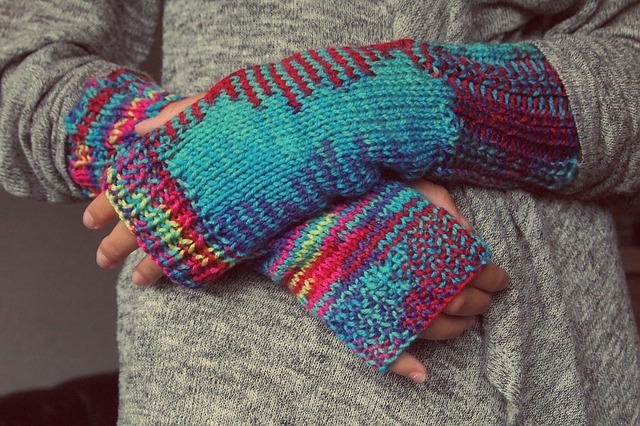
Crochet can give you more variety in your designs and are also a good way to add flair to your gloves. The two main designs you’ll find are gloves with fingers and fingerless gloves.
Fingerless gloves are much easier to make than gloves with fingers, so they’re perfect for beginners.
Here are some patterns to get you started:
All Grown Up Arm Warmers
This fingerless glove pattern is perfect for chilly weather. Despite being fingerless, this glove pattern has a cuff (that you can make into a longer length, if you want), so they’re perfect for weather that’s just leaning towards cold.
This pattern comes in two different sizes: small and large.
Materials
- 5mm hook.
- Worsted weight yarn; 185 yards, and in two colors.
Method
- Begin with crocheting the wrist’s cuff. Pick one colored yarn; we will call this yarn A. Leave an 8-inch tail, then chain 13. Turn.
- Working in back loop only, single crochet in the 2nd chain, followed by each chain to the end. Chain one, then turn.
- From the second row to 32nd row (36th for large), single crochet in a back loop only across chain 1. Turn.
- For the next row, turn to work into the side. Loop the piece into a ribbed cuff; the first and last row should meet. Chain 1 and single crochet into the side of the 1st Do not join just yet.
- For the stripes, insert the hook into the first stitch of the row in Step 4. Yarn over with your second color, and slip stitch to join. Chain 2 a total of 8 times for small gloves and 9 for large gloves. Join with slip stitch and chain 2.
- Double crochet in 6 stitches for small, 7 for large, then double crochet together 3 times. Join with a slip stitch and chain 2.
- Double crochet in 8 stitches (10 for larger size), then double crochet together twice. For smaller sized gloves, double crochet in the last stitch. Do not join.
- With yarn A, join the end of the row in step 7 with a slip stitch. Chain 2, then stitch with a back post double crochet in each stitch around. Join with a slip stitch, chain 2.
- Double crochet in the 1st for larger size gloves, double crochet twice in the next stitch. Double crochet each stitch to the last stitch. Double crochet 2 in the last stitch. Join with sup stitch, chain 2.
- Double crochet in each stitch around; do not join.
- With yarn B, join the end of the row in Step 10 with a slip stitch. Chain 2, then stitch with a back post double crochet in each stitch around. Join with a slip stitch, chain 2.
- Double crochet in the 1st stitch, then double crochet twice in the next stitch. Double crochet in the remaining stitches to the last stitch, double crochet 2 in the last stitch. Join with a slip stitch, chain 2.
- Double chain in the 1st stitch, then 2 double chain in the next stitch. Double crochet in remaining stitches to last stitches, double crochet 2 in the last stitch. Do not join. Break yarn B. make sure to leave a tail to weave in later.
- Now for the upper cuff. Begin with a setup row with yarn A, join the end of the row in step 13 with a slip stitch. Chain 1, single crochet with a back post in each stitch. Join with a slip stitch.
- For the first row, chain 13. Working in back loop only, single crochet in the 2nd chain from the hook and each chain. Single crochet to join two stitches together in the next 2 row stitches; this will be your securing stitch. Do not chain, then turn.
- For the second row, skip the securing stitch. Single crochet in the back loop only. Chain one and turn.
- For the 3rd row, single crochet in the back loop only. Make one securing stitch, then turn.
- For the 4th to 31st rows (or 35th row for larger gloves), repeat rows 2 to 3. Continue until row 32, or 36 for larger gloves.
- Single crochet in back loop evenly. Leave a 12-inch tail and break yarn.
- Sew the arm cuff together with a whip stitch, join first and last rows, working with the back loop only in the last row.
- On the wrist cuff, whip stitch the first 3 or 4 stitches together. This will leave a hole for the thumb; adjust the size accordingly. Weave in all ends.
This video shows another example of how to crochet fingerless gloves.
Conclusion
Gloves are a great way to add drama and panache, and they’re excellent for keeping yourself warm as well!
They may be more complicated to create than most pieces of clothing, but they’re a wonderful practice for beginner and intermediate sewists.
Being able to make your own gloves gives you more choices with your wardrobe, so go out there and get creating.
What are your favorite glove patterns?