
Slipping on a pair of knit mittens in the winter can be one of the best feelings in the world. They’re so soft and warm, and they make great gifts for your loved ones.
With so many great mitten patterns available, it’s difficult to know where to start. Is it as easy as it looks? Do you need special tools?
Let’s go through where you can find some free knitting patterns for mittens and how to make different kinds of knit mittens below.
Where to Find Free Knitting Patterns for Mittens
There are plenty of free patterns available in craft stores, knitting books and magazines, and online. These patterns will range in difficulty, so be sure you choose a pattern that matches your current sewing skill level.
The possibilities for mitten patterns are practically endless! So long as you pick reputable sources, you can be crafting away without a hitch.
- All Free Knitting is one such site. They have hundreds of free patterns for all types of knitting projects, so feel free to peruse the site for a mitten pattern you like.
- Stitch & Unwind is the knitting and crochet blog for those that run All Free Knitting.com, AllFreeCrochet.com, and AllFreeCrochetAfghanPatterns.com. It’s full of great patterns, pattern tutorials, crochet and knitting-related giveaways and announcements, and even serves as a place for you to ask them your knitting questions.
- The Spruce Crafts is another wonderful site that offers not only knitting patterns, but various, free DIY projects! With tons of new patterns and ideas being uploaded daily, you’ll never run out of things to make.
- Instructables offers numerous of DIY projects, provided by users from all over the world. They have basic tutorials on everything from electronics development to woodwork to all kinds of crafting projects, free for you to try personally! They even have a separate section for teachers who want to get their students interested in all kinds of fun topics.
- Bluprint offers plenty of free crafting and lifestyle classes on their site, driven by people who are just as passionate about your hobbies as you are! While you do have to pay a membership fee to access some of the website’s special features, they still offer many free knitting and crocheting tutorials for you to check out.
How to Knit Mittens
So, ready to dive in? This is a very basic pattern that both beginners and experts alike will have fun knitting.
Materials and Supplies
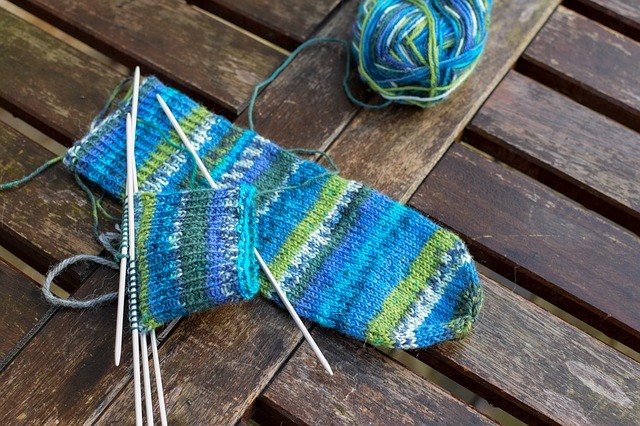
Before starting, make sure you have the right set of needles.
You will need a good set of five-millimeter, double-pointed knitting needles, since this craft project will require you to knit in a circle; the mittens will go on your hands after all.
Also make sure your needles are compatible with your chosen type of yarn. You can usually find the appropriate needle size recommendation on the label of your yarn.
- 1 ball of colored yarn of your choice.
- 1 ball of another colored yarn of your choice.
- Size-five-millimeter, double-pointed knitting needles.
- Tapestry needle.
- Scissors.
Method
- Cast on 30 stiches using your first ball of colored yarn, and make sure you leave a 20-centimeter-long tail trailing after it.
- Work your first row in a rib stitch and repeat until you reach the end of the row. Knit in this stitch for 11 more rows. Remember, a rib stitch is: knit one, purl one.
- Switch to your second ball of yarn, and knit in stocking stitch for six rows. If you need a refresher, a stocking stitch is: knit one row, purl one row. When knitting your first stitch, make sure to leave a 40-centimeter long tail. You’ll use this tail later to sew up the seams.
- Increase the row and then knit two, make one. In order to ‘make one,’ you simply pick up the strand that runs between the two stitches with your left needle; then, use your right needle to knit this new stitch through the back loop. Knit to the last two stitches, make one, and finally knit two again. Purl the next row after this.
- Repeat these two types of rows four more times, or until you have reached 40 stitches.
- Work in a stocking stitch for eight more rows.
- Decrease the row and then knit two, knit two stitches together, knit to the last four stitches, knit two stitches together again, and finally knit two. Purl the next row.
- Repeat these two types of rows four more times, or until you have reached 30 stitches.
- Knit two stitches together across the row, purl the next row, and finally knit two stiches together across one more row.
- At this point, you should have only eight stitches left. Cut any excess yarn off (not the tails), take the remaining stitches off the needle, then use your tapestry needle to go through these stitches and create a loop. Weave in the end.
- Use your tapestry needle and the 20-centimeter long tail to work in a mattress stitch, so as to sew up the seams. To do this, just place the two seams side by side with the right-sides up. Then, insert your tapestry needle under the horizontal bar between the first two stitches of the mitten.
- Pull the yarn through and insert your needle through the opposite bar on the other seam. Continue until you reach the section that you created from your second ball of yarn. Repeat this with the other tail until you reach the loop. Pull to tighten up your stitches and weave in the ends.
- Repeat the above steps again to make your second mitten.
Here’s a video showing another example of how to knit mittens.
Alternative Mitten Patterns
If you want to create mittens with a little more flair, then try these alternative mitten patterns!
How to Knit Mittens with a Flap
Mittens are great, but they make it difficult to use your fingers when you need them. You can always remove the entire mitten, of course, but we have a better solution—mittens with flaps!
Materials and Supplies
- 1 ball of bulky yarn in the color of your choice.
- Size-eight, double-pointed knitting needles.
- Yarn needle.
Method
- Cast on 20 stitches and divide into two needles, with ten stitches per needle.
- Use a knit two, purl two rib stitch for about three inches.
- Put those stitches onto a third needle. These stitches will be used to make the thumb.
- Round 1: Knit ten, make one, and knit ten.
- Round 2: Knit ten, knit one, then knit ten.
- Round 3: Knit ten, make one, knit one, make one, and knit ten.
- Round 4: Knit ten, knit three, and knit ten.
- Round 5: Knit ten, make one, knit three, make one, and knit ten.
- Round 6: Knit ten, knit five, then knit ten.
- Round 7: Knit ten, make one, knit five, make one, and knit ten.
- Round 8: Knit ten, knit seven, then knit ten.
- Round 9: Knit ten, make one, knit seven, make one, and knit ten.
- Round 10: Knit ten, knit nine, and knit ten.
- Round 11: Knit ten, make one, knit nine, make one, and knit ten.
- Transfer these stitches to a stitch holder, or sew a scrap piece of yarn through each of the stitches with your yarn needle to hold them in place. You should have ten stitches per needle.
- Keep knitting until you reach the bottom of the flap.
- Knit five rounds.
- Knit one, purl one on the palm side for five rounds, then knit ten on the back of the mitten.
- Cast off ten stitches in a knit-one-purl-one pattern, then knit ten on the back of your mitten.
- Cast on ten stitches, then connect them to the back of your mitten and knit ten stitches more.
- Knit ten stitches over the stitches you cast on.
- Try your mitten on. If you’re at pinky level, it’s time to decrease. If you still haven’t reached that point, continue knitting until you do.
- Decrease the row.
- Round 1: Knit two stitches together, knit eight, then repeat both stitches once.
- Round 2: Knit around.
- Round 3: Knit two stitches together, knit seven, then repeat both stitches.
- Round 4: Knit around again.
- Round 5: Knit two stitches together, knit six, then repeat both stitches.
- Round 6: Knit two stitches together, knit five, then repeat both stitches.
- Round 7: Knit two stitches together, knit four, then repeat both stitches.
- Round 8: Knit two stitches together, knit three, then repeat both stitches.
- Round 9: Knit two stitches together, knit two, then repeat both stitches.
- Cut a tail that’s at least 2.5 yards, then use your yarn needle to weave that tail through the remaining stitches twice before pulling it tight.
- Sew this tail through the top of your mitten, then tie it to create a small loop. After that, sew the tail down the side of your mitten until you reach the flap.
- Put one double-pointed needle into each stitch at the top of the flap. From here, knit one, purl one across with the tail yarn.
- Sew the end of the tail through the side of the mitten, from the inside to the outside again, just below the level of the row you knitted across from the previous step. This will secure the flap, so that the gaps in between will be covered.
- Repeat this knit-one-purl-one pattern and secure the flap to the sides for six rows. Cast off, then sew the remaining tail down to your mitten’s thumb.
- Finally, you need to finish off your thumb:
- Insert two double-pointed needles into the thumb stitches, so that one needle has six stitches on it and the other has five.
- Knit one round.
- Knit four, knit two stitches together, and then knit five to create ten stitches per needle now.
- Knit around until your thumb fits when you try it on.
- Knit two stitches together, knit three, and then repeat both stitches once.
- Knit two stitches together, knit two, and then repeat both stitches once.
- Knit around again.
- Using your yarn needle, pull the yarn through the remaining six stitches twice before pulling it tight. If there are still any small holes near your thumb, sew them closed. Weave the end of your yarn inside your mitten and tie it snugly to secure it.
- Add a nice button to the back of your mitten, which will be used to secure the flap.
- Repeat these steps for the other mitten. Make sure you put the flap on the appropriate side for your other hand.
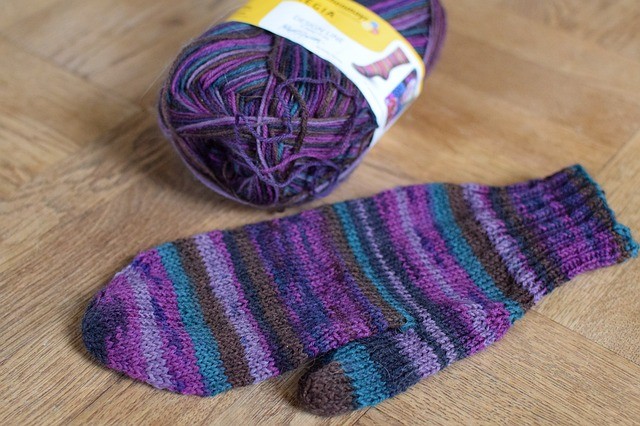
Super Bulky Yarn Mittens
If you choose a chunky or super chunky yarn for your mittens, you’ll find that the knitting process is much faster than if you used a simple medium-weight yarn.
If you plan on making some extremely last-minute gifts, then it’s worth turning to this style of yarn; your nerves and hand muscles will thank you!
Gauntlet Mittens
Gauntlet mittens are specifically made for those who live in harsh, cold conditions. They are designed to keep heat contained within them, so your hands don’t freeze.
They can be created from numerous kinds of material, including leather, fur, or even a combination of both.
You can find instructions to make your own fuzzy gauntlet mittens here. Alternatively, you can peruse a mitten pattern book or one of the crafting websites listed above.
Because you’ll be working on rougher materials, like leather (see our best leather sewing machine here) and fur, to create good gauntlet mittens, you should only tackle that project if you’re an advanced sewer.
Here’s a video showing another example of how to knit mittens.
Conclusion
Knit mittens are one of the coziest winter clothes you can sew, and with so many patterns, you’ll have no shortage of ideas to try out!
Now that you know how to knit mittens, why not make a few colorful pairs for yourself and your loved ones now?
What’s your favorite type of mitten pattern?