
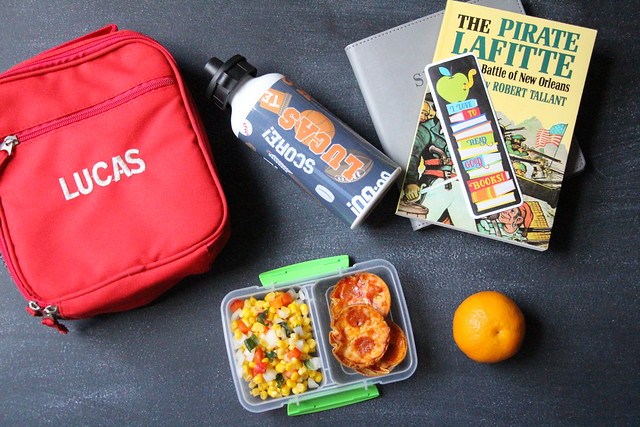
When it comes to getting work done, be it in school or the workplace, food is always important. What’s the best way to ensure you have the energy you need? By packing lunch, of course!
If you’re packing lunch every day, you may want to move away from a flimsy paper bag. Thankfully it’s super easy to make a DIY lunch bag!
These tutorials will teach you how to make lunch box cover bags, whether you’re packing lunch for school or work.
Quilted vs. Cloth Lunch Bags
There’s very little difference between quilted and cloth lunch bags. Choosing between the two options depends wholly on your own preference.
A quilted lunch bag is an excellent choice for people who have a great deal of spare fabric lying around. Because of the quilting process, you may also end up with a sturdier bag.
However, you can easily create a sturdy bag with a basic cloth design; just make sure to secure seams and handles, and you’re good to go!
How to Sew Lunch Box Bag
Classic Zipper Lunch Bag
This easy lunch bag pattern is perfect for beginners who want to save time, although it may be complicated at first.
It uses different pieces of fabric cut out from a pattern, and although multiple pieces may seem overwhelming, it’s just a matter of piecing them together.
Materials
- Outer fabric, specifically a thick, decorator-weight fabric.
- Sewing machine.
- Zipper, ten inches.
- Tailor’s chalk (or any other way to mark your fabric).
- Sewing machine with zipper foot.
Method
- Cut Out Pattern Pieces
There are three sizes of fabric that you will need to cut out. The biggest piece should be 19 x 6 inches. This will be your middle piece, composing the main body of the bag.
The second size is 9 x 6 inches. Cut out two pieces of this size. These will make the sides of the bag.
The smallest piece is 3 x 10 inches. Cut out two pieces of this as well. These will be for the zipper.
If you want cleaner edges, you can create two pieces of piping, 20 inches long.

- Connect the Middle and Side Pieces
Take the largest piece (the middle piece) of your fabric. Find the center of its longest edge, and mark it with tailor’s chalk, or a washable marker. Then, take a side piece. Find the center of its shorter edge; mark this as well.
If you are using piping, place it on top of the bigger piece with the cord-side facing you. The bigger piece should also have its right side facing you. (For beginners, a good piping tutorial can be found here.)
Place the two pieces on top of each other, so that the markings are aligned, right-sides together. Now, stitch the length of the shorter piece to attach it to the bigger piece using a zipper foot.
Open it up and finger press long the seams.
- Begin to Form the Bottom of the Bag
Now is time to attach the longer side pieces to the bigger piece. With the right side still facing you, take the top of the side piece and fold it at a 90-degree angle downwards.
The left side of the shorter piece should be aligned with the top-left side of the bigger piece. The side piece should be slightly bigger; this is fine.
Stitch these sides together. It will now look like a corner of the bag’s bottom portion.
- Add the Second Portion of the Bottom
Now, connect the other side of the shorter fabric piece.
To do so, take the other side of the shorter fabric piece and attach it to the other side of the longer fabric piece. At this point, it should begin to look three-dimensional.
If you sewed all the right pieces together, you should have an incomplete bottom portion of the bag, with one shorter side missing.
- Add the Missing Side Piece
Now it’s just a matter of adding the missing side piece. Begin by finding the center of the shorter end of your side piece, and the center of the bottom piece.
Then, connect the two pieces. Once connected, it will be easy to attach the longer edges of the side piece to the rest of your bag.
At this point, you should be able to prop the bag up, and it should hold its shape.
- Make the Zipper Placket
Set your current creation aside, for now. It’s time to create the top part of your bag!
Take the smallest pieces and place them face-down on your worktable. Line up one edge of the zipper, also face-down, against the longer edge of one piece. Center the zipper, and stitch using the zipper foot.
Stitch the other edge of the zipper using a zipper foot, and you’re done with your top piece!
- Attach the Zipper Placet to Your Bag
To attach the zipper, first, place the body of your bag so that the side pieces are to your left and right. Note that the side pieces are the ones with a bit of fabric jutting out.
Then, take your zipper, still facing downwards. Hold it crosswise, and find the center of the edge closest to you. Mark this center. Then, take the edge of the bag closest to you (this will belong to the largest fabric piece) and find and mark its center.
Connect the two edges with the centers aligned. Then, connect the side seams to the rest of the zipper as well, keeping a ¼ inch seam. Sew from one end of the side seam, including the centerpiece, up to the other end of the side seam.
Stitch with a zipper stitch, keeping a ¼ inch seam. This seam will be slightly twisted along the corners, but you can adjust it by adding or subtracting from the seam allowance. Clip the seams after you’re done.
- Turn the Bag Inside Out
To attach the rest of the zipper placket, we will need to turn the bag inside out. Open the zipper slightly, and turn it inside out.
Now, the bag should be a rectangular shape, as the extra fabric from the side seams is tucked inside the bag. Stitch the remaining side of the zipper placket like you did in the previous step.
- Make the Handles
For the handles, cut out two fabric pieces that are 2 ½ inches wide and 14 inches long.
Fold each piece lengthwise along its center. Then, stitch the edges together with a ¼ inch seam. Turn them inside out.
- Attach the Handles
Open up the bag slightly so that you can expand the inner side seams. Divide this edge by three so that you have two markings.
Place the ends of the hands on these two markings, and stitch. Do this for the second handle as well. Make sure to stitch the handles at least three times, as these will hold the contents of the bag.
Tuck the handle and the sides back inside the bag.
- Finish the Side Seams
Now it’s time to line the seams at the top of your bag; this will ensure that your fabric doesn’t fray from the inside. The lining will also make your bag sturdier, so that it could hold more weight.
To finish your side seams, you can cut out long fabric strips and sew it along the fabric edges. You can also go along the seams with a zig-zag stitch.
- Finish the Bag
After finishing the side seams, turn your bag inside out. Ta-da! You have a new lunch bag.
Here’s a video showing an alternative to a DIY lunch bag.
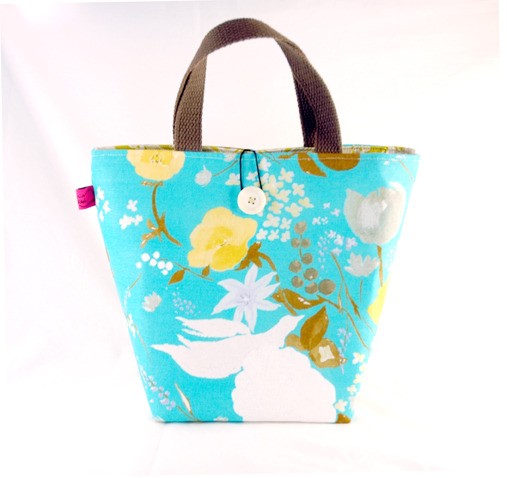
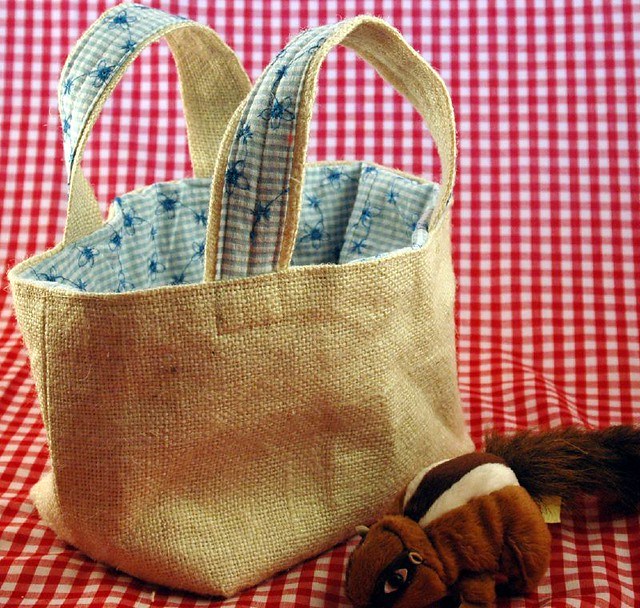
Cloth Lunch Sack
For those who want a faster lunch bag project, this tutorial is for you. The pattern will create a smaller bag that carries little more than a sandwich, but it’s great for those who like to pack light.
They’re also very easy to make, so you can create several to bring along for lunch!
Materials
- Two pieces of 14 x 27.5-inch exterior fabric.
- 15 x 27.5 inches of interfacing.
- Snaps or Velcro.
Method
- Fold your fabric in half, keeping a gap of 4.5 inches from the top.
- Starting from the two bottom edges, measure three inches upwards. Then, create two horizontal lines from the sides, measuring 2.5 inches. From the top edges, measure 2.5 inches to the center, and make lines 4.5 inches-long downwards.
- Cut out the two lines from the top, so that you have two rectangles.
- Snip across the bottom markings as well, so that you have two slits. Include the fabric behind it.
- Now sew along the sides of the fabric, keeping between the parts you marked.
- Flatten the bottom of your bag and cut off the excess fabric. It should form a rectangle. This edge should now be open. Sew it closed, and you will have the bottom of your lunch bag. Do the same for the other side.
- Apply interfacing to your fabric, repeating the same pattern as with your exterior fabric. Place one inside the other, and sew the raw edges together. Make sure to leave a gap for your front flap.
- Turn your lunch sack inside out, and topstitch around the top.
- Fold in the center, and attach the Velcro or snaps. You’re done!
Insulated Lunch Bag
Of course, when it comes to lunch bags, you may want to keep your food hot—or cold. For that, you’ll need an insulated lunch bag!
This design is both adorable and functional. While it’s best suited to more advanced sewists, if you’re a beginner, you’re certainly welcome to try it!

Materials
- 1/2 yard of oil-cloth fabric.
- 1/2 yard of nylon fabric.
- 1/2 yard of needle-punched insulated lining.
- 14-inch zipper.
- 1 yard and 1 inch of Polyester webbing.
- Coordinating thread.
- Universal regular-point sewing needles.
- Fabric scissors.
- Ruler.
- Binder clips.
- Sewing machine.
Method
- Cut out 12 x 24 inches of oil-cloth fabric, nylon fabric, and insulated lining.
- Place the insulated lining along the wrong side of the oilcloth. Match up the edges. Then, stitch along the side seams with a ¼ seam allowance.
- Align the outer edge of the zipper with the side edges of the oil-cloth, right-sides together. Place the nylon fabric on top of the zipper, so that the zipper is between the oil-cloth and nylon fabric. Clip the edges in place and sew with a zipper foot, creating a ¼ seam away from the zipper’s teeth.
- Open the fabric at the seam. Bring the opposite edge of the oil-cloth fabric to the other side of the zipper, right sides together. Take the nylon fabric again, lining up the edges so that the zipper is again sandwiched between the nylon and the oil-cloth. Clip it in place and sew with a zipper foot, again keeping ¼ inch away from the zipper’s teeth.
- Now, place the oil-cloth and the insulated lining right-sides together, with the zipper in the middle. Line up the edges and clip, making sure to leave a five-inch gap so that you can turn your bag inside out later. Sew along the edges, keeping a ¼ inch allowance. Trim the seams.
- Turn the bag right-side out. Sew along the gap to close.
- Flatten the corners into triangles, so that the side seam is at the center. Clip the triangle edges to keep them in place. Then, sew a straight line across the bottom of the triangle. Repeat on the other side. Trim off the triangles, keeping a ¼ seam from the stitches you just made.
- Now, cut out two pieces of webbing, 15-inches long. Fold the bottom edge for about ½ inch toward the wrong side. Find the center of your bag and measure three inches on both sides of the center. Pin the folded edge of webbing two inches from the top on each side; do the same for the opposite side.
- Sew around the webbing bottom.
- And congratulations! You have your insulated bag!
This video shows another example of an insulated DIY lunch bag.
Packing your own lunch shouldn’t be hard. With these easy tutorials, you’ll be taking lunch on the go with fun and style!
What’s your favorite DIY lunch bag pattern?