
Aside from fixing a broken seam, knowing how to sew a button is a must-have skill for everyone. You don’t need to go to a tailor or toss out a shirt just because a button popped off!
Sewing on your own button is the reason why so many shirts come with extras, just in case you lose one or two.
Thankfully, it’s a pretty easy process. All you need is a needle, some thread, and your button.
Picking Your Button
Knowing how to sew a button on a shirt or pair of pants is only half the battle.
Unless you have one of those spares that come with your article of clothing, it’s necessary to choose the kind of button you need.
Don’t worry, this choice can be pretty topical, but it does have some utility to it.
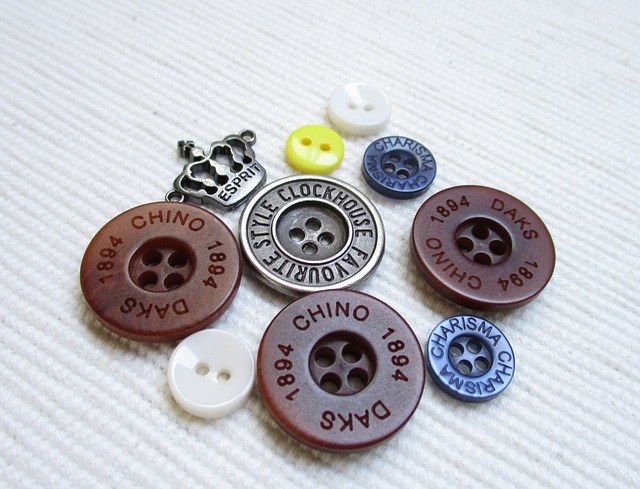
Flat Buttons
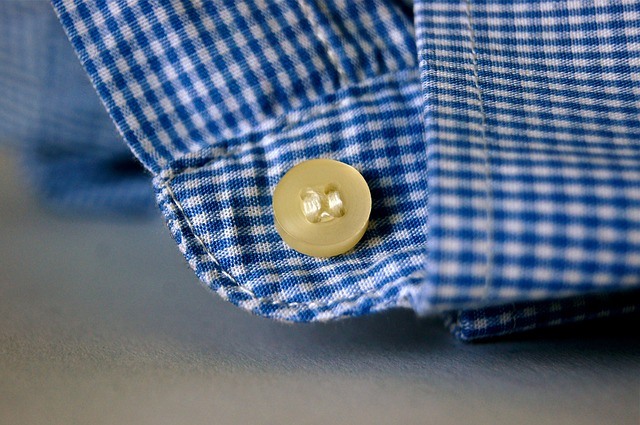
Most shirts use flat buttons; that button down shirt you bought for work most-likely has them.
They come in all sorts of shapes and sizes, but two things remain consistent: they lay flat against the fabric and they have holes on the tops of them.
Some buttons have only two holes and others have four, and typically the latter will be the sturdiest.
Shank Buttons
Shank buttons are those without any visible holes when looking at the surface. They do this by adding a hook to the back of the button.
This will cause them to stand on top of the fabric as it will not lay down flat for obvious reasons, but this also makes it a collar fastener for a dress which buttons at the back.
It’s easier to slip one of these through the opening as they don’t need to be expertly maneuvered.
Stud Buttons
Surprisingly, you don’t even need to learn how to sew in order to replace the fastening button on your jeans or pants. Most styles, and nearly all denim jeans, use stud buttons.
Stud buttons are a two-part button with a front piece and a back piece. The smaller back piece goes in through the underside of the fabric and the top side (typically larger than the back) goes on top.
This might require a bit of force to snap them together, but it’s very handy if you don’t already own a small sewing kit.
All you need to do is head to your nearest fabric or craft store, and you’ll be sure to find one of these buttons.
Materials and Color
In some cases, replacing a button when you have no identical match might mean replacing all of them. Yes, it’s a bummer, but the fun thing is that you get to be in charge of what styles you’ll use!
You could opt for wooden buttons, metal buttons, or colorful plastic ones! Whatever you pick, keep it consistent on your shirt, dress, or otherwise. Mismatching buttons aren’t a trend yet.
For the thread, attempt to match it to the color of the button, so as to avoid it being very visible (if you’re using a flat button).
For shank buttons where you don’t see the thread, using a similar color to the article of clothing is the best option. Again, keep this consistent.
How To Sew a Button
While you could theoretically sew on flat buttons with a sewing machine, not everyone has one and, in our opinion, setting up your machine may take longer than just doing it by hand in the first place.
See also: How to sew a buttonhole.
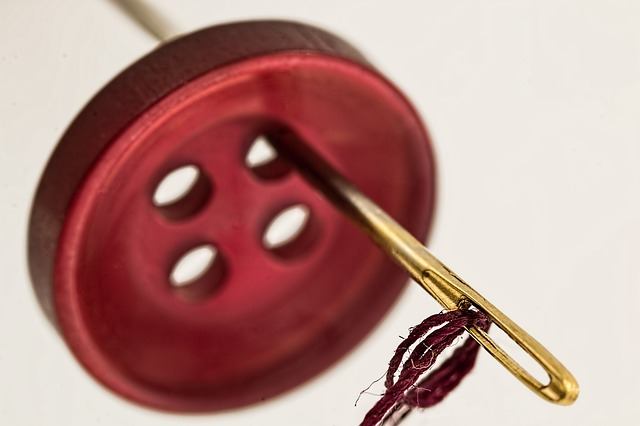
Thread the Needle
Unless you’re sewing on the world’s largest button, you’re not going to need a whole lot of thread.
You only need enough to be able to comfortably maneuver your thread through and away from your button. This is especially important when it comes to tying it off.
For this, use approximately ten to twelve inches of thread, which will come out to about five to six inches of usable thread after you take the two ends parallel to each other and loop them into a knot.
Knot it once or twice at the end and push the needle through the underside of the fabric. Give it a little tug just to make sure the knot doesn’t accidentally slip through or come undone.
And now, you’re ready to add your button.
Sewing the Button
For four-hole flat buttons, where you started your thread will not be the center of the button.
Slip your needle through the button hole and hold it firm against the fabric with your free hand. Then push your needle through the hole diagonal from the first opening.
On the underside, slip the needle through one of the holes you haven’t already gone through, pull it all the way out, and then push it through the last hole.
This will show an “X” on the top of the button with your thread. You can repeat the process if you feel your thread is frail, but this should hold on its own.
For stud buttons, slide your needle through the opening on the back of the button and push your needle through the fabric, close to (but not exactly) the original stitch.
Pull it taut, and then push it back to the surface again, through the button once more.
Push the needle through again and tie it off. Et voila!
See this video for a demonstration on how to sew a button.
Do you have any tips on how to sew a button?