
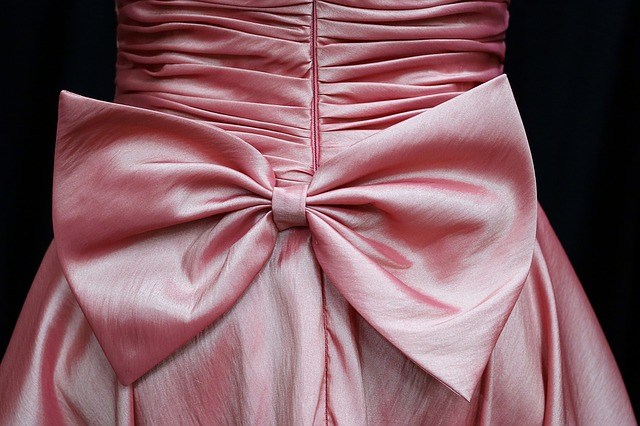
Is that hem looking too boring or bland? Why not give it ruffles?
Ruffles are a great way to provide hems with a cheap yet fancy upgrade. And, with a bit of practice, they are quick and easy to make.
The greatest aspect of ruffles is their ability to enhance any hem, as they are a versatile ornament that you can see on a range of different clothing.
From 18th century costumes to children’s dresses, to your favorite skirt, the ruffle is a dependable and fun technique for any sewist.
As such, let’s dive into the types of ruffles you can choose from and how to add them to your clothing or craft project.
What are Ruffles?
We’ve all seen ruffles, and most of us have probably worn one before. Ruffles are pieces of fabric evenly gathered on an edge.
While they look simple enough, ruffles are often problematic for beginning sewists, mainly due to the trouble of making full, even gathers of fabric lay properly.
In order to make good, sturdy ruffles, it’s best to approach it with a proven technique.
There are a few ways to make ruffles, which you can then choose from depending on the type you want to make, as well as the materials, time, and sewing experience that you have.
Types of Ruffles
SewGuide categorizes ruffles into six types, according to their placement.
It is important to note the style of ruffles you intend to make, as this ensures you’re accommodating the necessary widths and hemlines for your fabric.
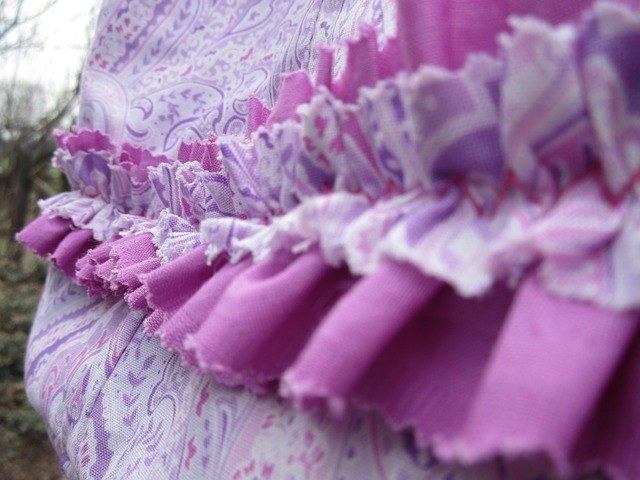
Single Edge Ruffles
This is the most common type of ruffle, and what people usually imagine when thinking of the decoration.
This ruffle is created by gathering a strip of fabric along one edge with a basting stitch. They’re often attached to a flat piece of fabric and used along hemlines.
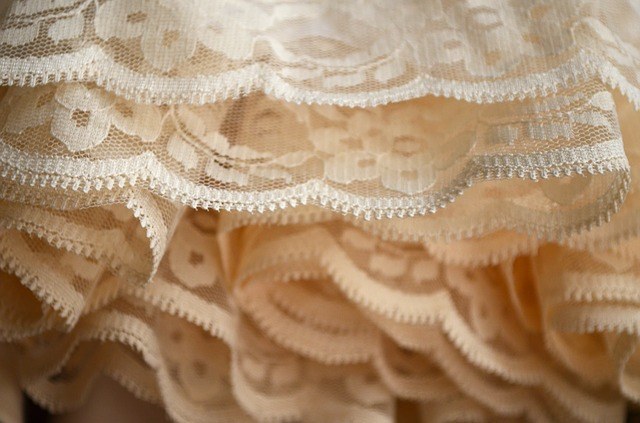
Double Edge Ruffles
Double edge ruffles are made with a single strip of fabric gathered by one (sometimes two) basting stitches in the middle.
This results in ruffles on both sides of the fabric. They’re often used as an embellishment, typically leveraged to disguise hemlines.
Double Width Ruffles
These are created just like the double edge ruffles, but with two strips of cloth.
You can fold over the same strip of cloth, or use two different fabrics, or use the same or differing lengths.
With this style, you’ll create interesting designs just by changing the pattern or the type of fabric.
Waterfall Ruffles
Waterfall ruffles are created much like single edge ruffles, only you are gathering an elastic thread along the fabric’s seam.
This type is most commonly seen in off-shoulder dresses or any type of hem that uses elastics at the seams.
Circular Ruffle
A circular ruffle is often made as an embellishment or accessory. They’re developed by creating a circular strip of fabric and gathering it in the middle.
For the specific steps on how to create a circular ruffle, check out the tutorial here.
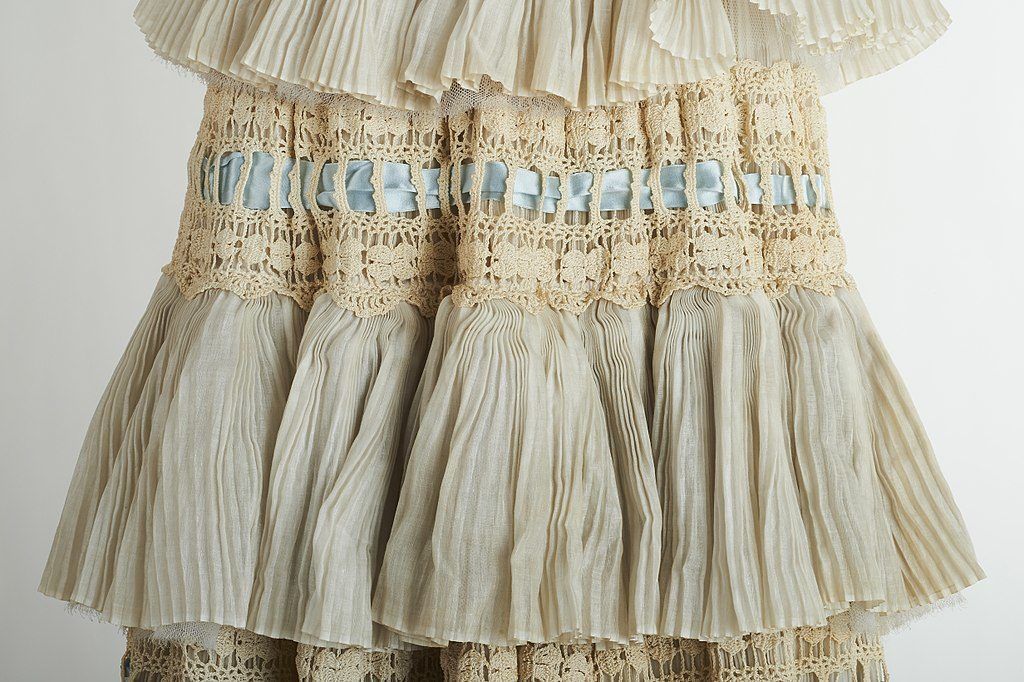
Cascading Ruffles
Cascading ruffles are typically an embellishment to necklines, as well as the back of gowns. This type of ruffle is created by modifying a circular ruffle to cascade along the hem of a neckline.
It’s mostly done on a piece of fabric with a large width, so as to provide that cascading effect.
How to Add Ruffles
While you may hope to add ruffles to all your clothing, beginner sewists will find that it’s more difficult than anticipated.
Often, those who make their first ruffles discover that they’re uneven, hitched on one part of the fabric, or are prone to unraveling. As such, beginners end up with sore hands and creased fabric.
If you want to create ruffles, what are your options? There are two methods you can approach: You can leverage a sewing machine to aid in making ruffles, with or without special accessories.
Alternatively, you can make ruffles by hand. We will discuss both options and the different ways you can use both to customize your designs.
Traditional Methods
Sometimes, you need to go traditional when sewing ruffles, either because you do not own a sewing machine or because your fabric of choice is not suitable for a machine.
While there are special ways to get quality, even gathers, it’s still wise to learn how to make ruffles without extra tools – if only to better understand what’s necessary to create excellent, clean gathers.
What is the usual way to make ruffles? The most basic method is to sew a basting stitch about ¼ inch from the edge of your fabric.
Make sure to leave long tails at both ends of the stitch, and then pull on one end of the thread to create gathers in your fabric.
This method can be messy, especially to beginners, as it’s prone to mishaps. To mitigate this, there are a few variations on the traditional basting stitch method, which involve making sure the stitches remain secure as you pull on the edges.
The best variation is to create two basting stitches. This second basting stitch will be created ¼ inch below the first and will provide more even gathers by acting as a support for the first basting stitch.
his video shows an example of how to sew cascading ruffles.
Sewing Machine
Sewing machines are a fantastic investment for crafters and will help make your projects faster and more accurate.
There are many accessories that you can pick to customize your sewing machine. For those learning how to make ruffles, there are two particular ones you’ll use: the gathering foot and the ruffler foot.
Gathering Foot
The gathering foot allows you to lay material flat under the foot and then develop the gather. The fullness of the gathers will depend on two settings: tension and stitch length.
As a rule of thumb, higher needle tension and longer stitch length will make your gathers bigger. Using a longer stitch length with bottom-level needle tension will make large gathers, but with less fullness or bounce.
For extremely large gathers, set both the needle tension and the stitch length at their highest settings. To add more body to your gathers, you can manually bunch up the fabric by gently pulling on the needle threads.
It should be noted, however, that these settings depend on the fabric that you’ve chosen. Gathering feet can work with finer, softer fabrics, like cloth and acrylic, as well as thicker fabrics like knit and wool.
No matter the fabric, it’s always wise to run a test on the material you’ve chosen, so as to accurately measure the degree at which your fabric will gather
. Even if you’ve used a similar kind before, each type of fabric is prone to behaving differently when it’s gathered. To test it, simply cut a strip of material at least twelve inches long.
You may need to create a few tests at varying degrees of needle tension and stitch length to get the effect you desire.
For an overview on how to gather fabric using the gathering foot, check out this guide here.
Ruffler Foot
While the gathering foot uses needle tension and stitch length, the ruffles foot instead pleats the fabric. One part of the foot stitches, while another tucks in fabric every set number of stitches.
You can adjust how many stitches the ruffle should wait before pleating; your foot will probably have four settings.
The first setting, indicated by a star, means that there will be no pleating at all – the ruffler foot will simply create a regular basting stitch.
The second setting, indicated by the number 12, will make a pleat every 12 stitches. The third setting, with number six, will pleat every six stitches. The last setting, with the number one, will pleat after every stitch.
Just like the gathering foot, the fullness of your gathers will also be affected by the length of your stitch. As such, a larger stitch length will create a larger gather, but with less bounce.
While this type of sewing machine accessory can handle thicker pieces of fabric, the ruffler is only best used with lightweight fabrics. As such, the accessory is a great solution for problems like how to gather tulle and other such fabrics.
For a guide on how to use the ruffler foot, check out this guide.
Which One to Choose
The main difference between both feet is how they create gathers.
The gathering foot does so in the traditional way, using needle tension, and can, therefore, be manually adjusted if you feel it’s not performing to your tastes.
On the other hand, the ruffler gives you more options in terms of customization.
While you may feel the ruffler is your prime choice, do remember that it’s not the best sewing accessory to use on thicker fabrics. If you’ve chosen knit or wool, it’s best to stick with the gathering foot.
Additionally, your choice may also be dictated by the machine that you own. Newer models tend to be compatible with both feet, but you should still verify this in advance, or else risk being stuck with an accessory and a planned method you can’t use.
Sewing Without Special Feet
At times, a gathering foot or a ruffler foot is just too finicky, and you encounter the same issues presented when developing ruffles by hand.
Also, your sewing machine may not be compatible with either a gathering or ruffler foot. If this is the case, you can still work on your sewing machine without utilizing these special feet.
This method from the Seasoned Homemaker leverages a basting stitch and two different colored yarns; as such, it’s a great approach for sewing ruffles without special feet.
- Set the needle length to the longest setting. This will give you more space to bunch up your fabric later.
- Place colored thread in the bobbin. This will be your gathering stitch. Place a thread of a separate color in the needle. The bobbin thread will be pulled out later, which means that you can make it any color you prefer, without concern of it affecting your final product.
- Create a basting stitch across the length of the fabric. When reaching the edge, pivot your fabric to the right, and create one stitch. If you plan on attaching your ruffle to another flat piece of fabric, you may need to increase this to two stitches.
- Twist your fabric to the right again and create another basting stitch, parallel to the first. After this, you’ll end up with a rectangle that has one edge open.
- After you have made your second basting stitch, leave about seven inches of thread toward the end.
- Pull out the bobbin thread, leaving the needle thread in place to keep the ruffles intact. With that motion, you’ll have created a clean, beautiful set of ruffles.
Attaching Ruffles to a Flat Piece of Fabric
Ruffles are often created as embellishments. However, there will be instances wherein you hope to create ruffles that attach to a flat piece of material.
Attaching ruffles in such a manner, especially by hand, will require you to pin the fabric in place before proceeding.
For this reason, it’s always best to work on a flat surface, sectioning off the fabric to ensure that both pieces remain securely in place.
When attaching a ruffle by hand, be sure to iron it before proceeding, so as to avoid unsightly creases or an uneven final product.
Attaching ruffles using a sewing machine will make lining up both pieces of fabric easier. The gathering foot and the ruffler foot can be used for this task; just place the second piece underneath the fabric to be ruffled, and then sew away.
This video gives an example of how to sew ruffles onto a skirt.
Practicing Ruffles
Ruffles can be intimidating at first, but there are many ways for you to master the technique.
Getting the hang of ruffles is just a matter of finding a method that works for you and practicing that style until you’re comfortable.
With enough practice, dedication, and patience, you’ll be sewing ruffles on everything in no time.
Do you have any tips on how to sew ruffles?