
Properly caring for your tools is the number one rule for crafters. If you’re a sewist, the most important tool you have in your arsenal is the sewing machine.
Composed of many different moving parts, a sewing machine needs excellent care to remain in tip-top shape.
To accomplish this, a dust cover or protective cover is a great asset – but why pay full price? You’re crafty; you can make your own!
Why Make a Sewing Machine Cover?
Aside from being a fun project, creating a sewing machine cover is helpful in many ways. Here are a few:
Helps Keep Your Sewing Machine in the Best Condition
Storing your tools properly can ensure that they stay clean and in good condition. If you’re storing your fabric and scissors in cute and optimized drawers, why aren’t you giving your sewing machine the right treatment?
Creating a sewing machine cover ensures that it stays dust-free and has extra protection in case of a fall – depending on what your cover is made of.
Not to mention, it looks very cute too!
You may also want to consider a suitable sewing bag if you are transporting it around.
Additional Storage Space
Crafters of all shapes and sizes go crazy for a bit of additional storage space, and for good reason.
With all the tools we use on a daily basis, finding the optimal – and, if possible, cutest – space for that one tool can be a godsend.
Since sewists are no exception, you may be excited to realize that you can add pockets – yes, pockets! – to almost every sewing machine pattern that you can find.
These are perfect for storing a bit of extra fabric, a good pair of scissors, or a container of thread.
Great Practice as First Project
If you’re looking for a good project to practice your sewing chops on, have you ever considered making a sewing machine dust cover?
They serve as fantastic beginner projects since they incorporate a few key techniques that are helpful for any new sewist.
And they allow for just the right amount of flexibility and creativity, helping you to find a pattern that is perfect for your skill level.
Even better, a sewing machine cover is something you will look at every time you need to sew. This means that if you ever learn new skills and techniques, you can easily look back on where you started and find ways to improve the projects you’ve already made.
Where to find Sewing Machine Cover Patterns
Because of its relative ease, tutorials on how to make a sewing machine cover are abundant on the internet. There are many patterns available, whether they are run by independent bloggers or sewing magazines.
Additionally, several places offer a free sewing machine cover pattern, although there are some that require payment.
Some of the patterns may specify that they are made for Serger models, but they can easily be tweaked for any model.
The patterns that you find will most likely fall into two types: the drape and tie method, and the full-cover.
To start off, Fave Crafts has listed fifteen patterns for sewing machine covers. You can check that out here. The Seasoned Homemaker also has a list of six designs, all of which are funky and fun.
How to Make Your Own Sewing Machine Cover
After browsing the internet, if you find a design that isn’t intended for the model of sewing machine that you have, a sewing machine cover pattern can be easily be altered to fit your model – no fuss, no muss!
If a pattern you find doesn’t have all the features you need, you can easily add features, like pockets, ribbons, and buttons, to give it your own flare.
We’re going to look at a few basic designs, followed by ways to incorporate additional features that you may want on your cover.
Simple Serger Cover by the Seasoned Homemaker
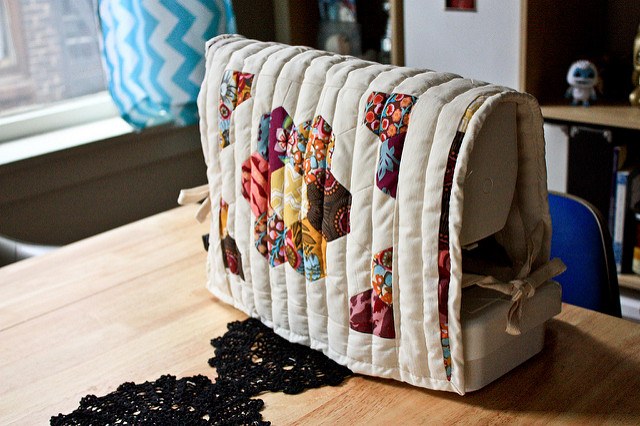
For those who want a quick and easy way to develop a cover for their sewing machine, the simplest method out there is probably the drape and tie design.
Simply put, this is a cover made from fabric draped over the machine, tied in place using ribbons across the width of the model.
For those who don’t want to fuss too much over the specifics of your sewing machine cover, or for those who want to have an alternative when the other cover you own is in the wash, this pattern is ideal for you.
Note, however, that due to the nature of the drape and tie method, you probably won’t have as much flexibility when it comes to adding pockets and other decorations.
Adding features or decor would require you to balance both sides of the cover, especially when you are using lightweight fabric. Because of its build, you will also need to account for the weight that each feature or decoration has, and keep both sides balanced.
An unbalanced design won’t hurt the machine but could make transport difficult or result in the cover sliding off.
This pattern from the Seasoned Homemaker was made for a Serger sewing machine but could be easily used to cover other models.
Since the drape and tie method is incredibly easy, this pattern can be made by beginners.
Materials
- The sewing machine’s measurements.
- Fabric, for both inner and outer layers.
- Batting or light interfacing for the middle layer.
- Fabric for edge bindings and ties.
Process
- Measure your sewing machine
To begin, you will need to measure your sewing machine.
The measurements required are as follows: the height, which is the measurement over the top and down the back of your machine; and the width, which is from side to side at the widest point.
- Create the outer and inner fabrics
The inner and outer fabrics can be made using two methods. The first is by measuring out the fabric that you will need from a bolt.
The second is by using scraps of fabric that you already have lying around. Both methods work well; all you need to do is ensure that the inner fabric has the same measurement as the width and height of your sewing machine.
The outer fabric, on the other hand, will have the same measurements, with an inch added for leeway.
If you want to use scraps of fabric for your outer layer, simply stitch all the fabric pieces together with a 1/4-inch seam.
- Create the batting
The inner fabric will give your sewing machine cover just a bit more structure. It can also ensure that your cover lasts far longer.
To create the inner fabric, simply measure the same width and height of your sewing machine measurement, and sandwich it between both the outer and inner fabrics.
The inner fabric can be made with batting, or even light interfacing.
- Connect the outer fabric, inner fabric, and batting
The three layers of fabric should be lined up and pinned together. For those who didn’t use leftover pieces of fabric, these three pieces can be sewn together like usual, with a backstitch at the edges.
For those who used scraps of fabric, however, it would be best to quilt the fabrics.
The Seasoned Homemaker uses a simple wave design on the quilting, although you could easily create a more intricate pattern, should you so desire.
The tutorial also uses water-soluble markers to create the pattern beforehand, so that you could easily go over it with a backstitch on your trusty sewing machine.
Simply wash off the markings after you’ve finished with your cover.
- Prepare and stitch the edge binding
The edge binding will need to be 2.75 inches wide, with a length that is equal to all four sides of the cover, plus ten inches.
Since you would probably need a long stretch of edge binding, you will need to connect two pieces to each other.
To create a clean stitch, lay both strips over one another so that it creates an L shape, and stitch at a 45-degree angle.
The edge binding should be connected to the sewing machine cover with a 3/8-inch seam, with a traditional mitered edge at each corner.
- Prepare the ties
The ties will hold your sewing machine cover in place. It’s best to create them using the same material as your edge binding, so that they can be hidden behind the binding.
These ties should be 1.5-inch wide, with a length equal to the height of your sewing machine. Stitch with a 1/4-inch seam and cut into four pieces.
- Stitch the ties
From the top and bottom corners of your sewing machine cover, measure 6.5 inches. These will be where you will insert your ties. Stitch them in place.
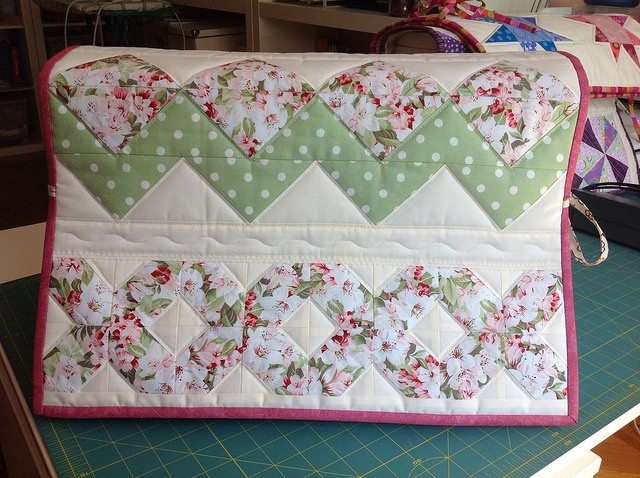
Here’s an example of a sewing machine cover with embroidery.
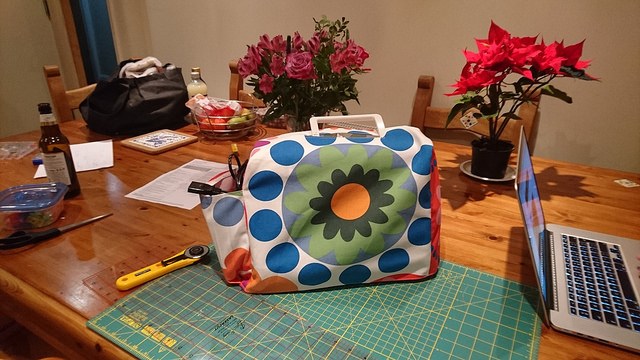
Sewing Machine Cover from Hobby Craft
For those who want a pattern that covers the entire sewing machine, this pattern from Hobby Craft will be perfect for you.
This method allows for greater leeway if you want to add extra features to your sewing machine cover. This pattern also encourages more features and decorations, should you want them.
It calls for one pocket, but there’s room for more, depending on the size of your machine.
Materials
- 1 yard of fabric.
- 9 inches of contrasting fabric, for the pocket.
- 1 yard of interface, medium.
- 5 yards of 1-inch contrasting bias binding.
- Sewing machine measurements.
Process
- Measure your sewing machine
Before anything else, take the measurements of your sewing machine.
For this pattern, you will need the height, width, and length of your machine, adding two centimeters for the seam allowance.
- Create a pattern on paper.
The measurements are as follows:
- 2 front and back pieces, equal to the sewing machine’s height and length.
- 2 sides, equal to the sewing machine’s height and width.
- A pocket piece that is equal to half the height and width of your sewing machine. (You may add more pockets depending on the width of your machine.)
- 1 piece for the top, equal to the sewing machine’s width and length.
- Prepare the fabric pieces
With your pattern drafted, you can now begin to create fabric pieces. Cut them out individually. Then, follow with the interfacing.
Remember to add a bit of leeway between the fabric and interface edge, as this will help you avoid sewing pieces too tightly.
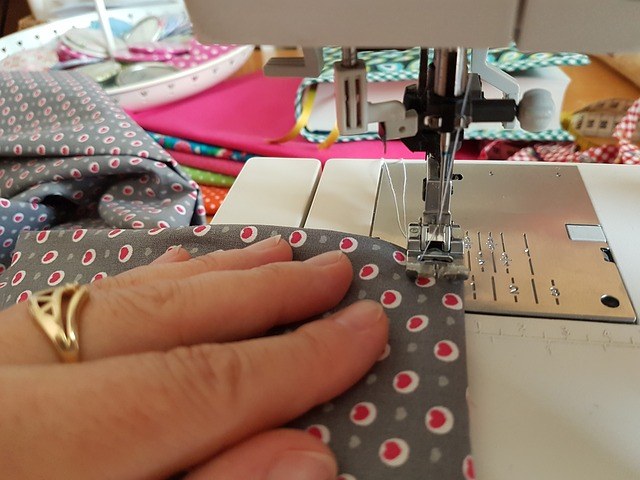
- Stitch the edges of the fabric pieces
Stitching the edges of the fabric pieces will lessen the chances of it fraying.
You can opt for other types of stitches, but Hobby Craft recommends the zigzag stitch.
- Connect the pieces
First, attach the interfacing to the fabric. Cut off the excess interfacing. With the interface connected, connect the top pieces and side pieces, starting from the right side.
Make sure to leave 1 centimeter un-sewn at each end.
- Prepare and connect the pocket
Should you want to add a pocket to this pattern, create a bias to the top. This will ensure that it does not fray.
Then, connect the pocket to the bottom of one of the side pieces, and sew.
- Connect the rest of the fabric pieces
To connect the rest of the pieces, take two side pieces and stitch. This will create one half of a box shape, without a bottom.
Complete this box by connecting the other side pieces.
- Bind the edges
The edge binding can be made using the same technique in the drape and tie method, with the length equal to the bottom edges of your sewing machine cover.
You may also opt to use bias binding.
This video shows an example of a fitted sewing machine cover.
Respect for Crafting Tools
While it’s a practical and helpful project, a sewing machine cover can be more than just taking care of your machine.
It adds a touch of flair to your crafting area, and also shows a degree of respect for your craft.
When you maintain your tools properly, you use them with greater care, inherently resulting in better outcomes for all your projects.
A personalized sewing machine cover allows you to gain skills, keep your machine in top working order – but also helps you better respect the craft.
What’s your favorite sewing machine cover pattern?