
Elbow patches on professors may not be considered the height of fashion today, but the process by which those patches were applied is surprisingly well-integrated into the world of textiles.
Appliqué, or the process of attaching one piece of fabric to another, is a practice that allows for more than just a dignified appearance at the front of a classroom.
Appliqué can be used while quilting, with ribbons and beads, and in any number of projects you wish to pursue.
Want to learn how to make appliqués, and integrate the practice into your crafting time? You can use this guide to explore different variations of appliqué and the many ways in which it can make your sewn work stand out from the crowd.
Appliqué: A History
According to the writers at The Sprout, the practice of appliqué is one of the oldest forms of design in the world. The term comes from France, where “appliquer” means “to attach or apply.”
Creative Machine Embroidery’s writers note that appliqué appears in the clothing worn by Turkish royalty in the late 18th century, as well as in the ribbon work incorporated into French designs, suggesting an international appeal to the practice.
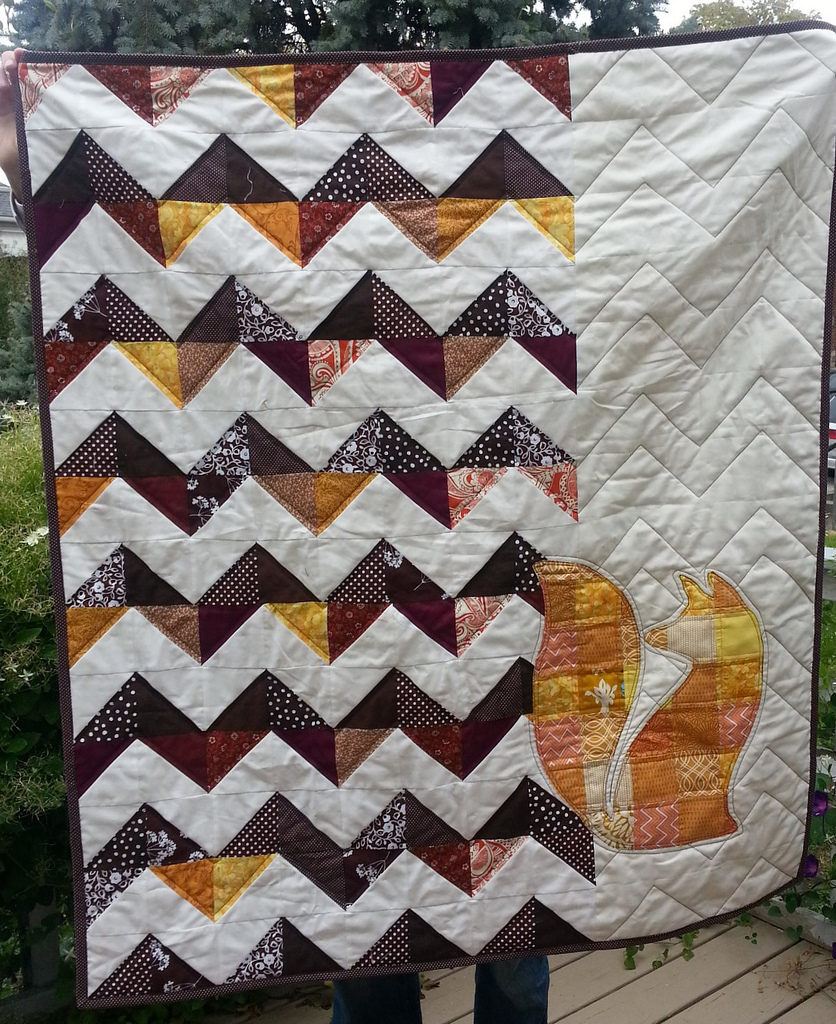
American flower borders also made use of appliqué techniques when the crafts industry took flight in the 19th century, and appliqué quilts became more prominent in the home.
The widespread nature of the practice means that many variations have arisen over the years, but generally speaking, the definition of appliqué has remained constant.
Understanding Modern Appliqué
That consistency of definition means that to say “appliqué” is to speak of a topic that is both broad and highly specific.
With that said, appliqué is still generally considered, according to Women’s Wear Daily, a design technique through which one piece of material is attached to another.
While “appliqué” typically applies to the application of textiles or fabrics, the process can also include attaching beads, sequins, or other embroideries to a piece of clothing.
As such, the same appliqué techniques used to patch up professor’s elbows can be used to decorate quilts. The practice of tailored appliqué and decorative quilting appliqué is, in this effect, the same thing.
The Basics of Appliqué
If appliqué techniques are as simple as connecting one piece of fabric or decoration to another, then you’d assume the practice would remain fairly straightforward. That is not, however, the case.

Learning how to make appliqués requires a bit of creativity and variation, depending on the project you want to undertake.
That said, there is still a general pattern of behavior that remains constant through all variations of appliqué.
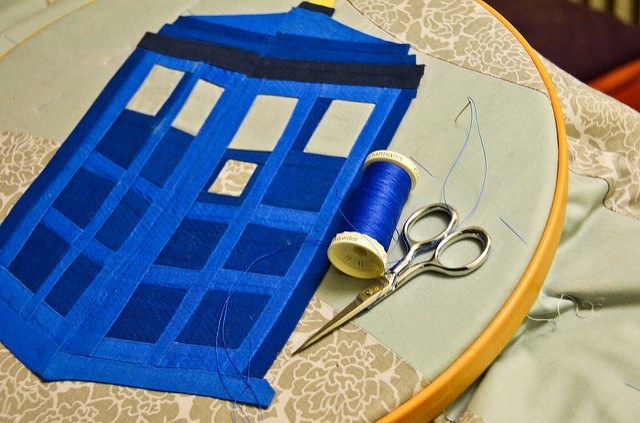
Step 1 – Outlining
When beginning your appliqué project, you will need to trace your design of choice onto a piece of webbing or make a template for the to-be attached fabric that you can follow. This will make the project visually easy to follow and help you avoid mistakes.
Once a paper design has been sketched, it can be cut out accordingly and placed onto the to-be attached fabric.
Step 2 – Cutting
From this point, you can follow your pattern and cut out your fabric that is to be attached. Be sure to leave a ¼ inch border around the template, though.
The spare fabric will be used later during the appliqué process, and it also provides you with a bit of give in your project.
Step 3 – Ironing
Once you’ve cut out your fabric, iron it onto the material you want it connected to. This is made easier through a variety of techniques that will be discussed in more detail shortly.
Overall, this ironing process ensures that the two pieces of fabric can be joined more easily in the following steps.
Step 4 – Securing
Then, depending on the appliqué method you’ve chosen to use, you can either peel the backing paper off of your appliqué in order to secure it or give it a few initial securing stitches.
Either way, after the attach-able fabric has been secured, you’ll want to stitch around the piece’s edges and create a seamless flow between the base fabric and your decoration.
And those are the basics of appliqué technique! However, there are a number of variations on the practice that you can make use of in order to better suit specific projects or your skill level.
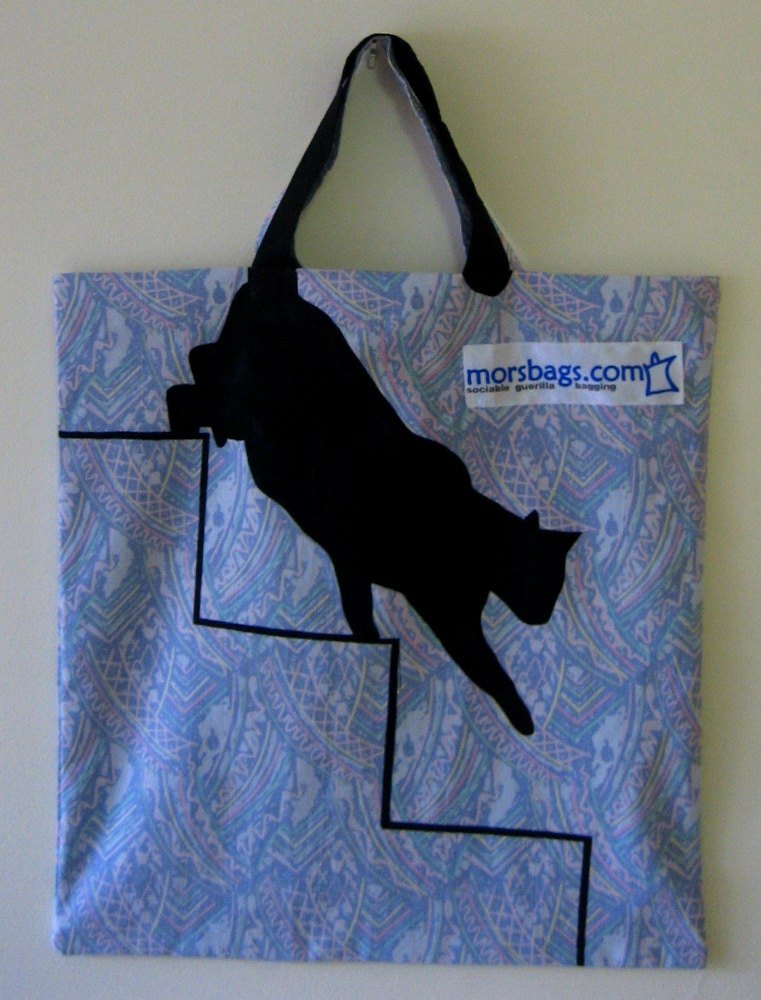
Raw Edge Appliqué
Raw edge appliqué requires less time devoted to sewing and can be accomplished fairly quickly.
This process, according to the writers at Pile O’Fabric, lets you use a fusible web or fabric glue in order to connect one piece of fabric or decoration to another.
This technique is referred to as “raw edge,” because the edges of the attached piece of fabric are left raw or unfinished.
The sewing that would otherwise secure the piece of fabric to its base is more for decoration than actual security, and that sewing is done inside the edge of the attached fabric.
Reverse Appliqué
Reverse appliqué, in contrast, forces you to change your appliqué perspective. According to the writers at Patchwork Posse, this process allows you to cut through your base layer of fabric in order to reveal the appliqués.
This technique is considered reasonably simple, but it does work best if you have a sewing machine at your disposal.
In order to make use of a reverse appliqué, you’ll need to sketch the design of your choice onto the base fabric. Then, trim the fabric away and sew the boundary with a ¼ inch allowance.
This technique enables you to add a pop of color to your sewing projects while embracing a slightly different look than that of traditional appliqué.
Different Appliqué Techniques
Those are two basic alterations to standard appliqué. However, beyond that are different ways in which you can attach two pieces of fabric or decorations to one another.
These processes, again, are specialized in order to help you use appliqué on a variety of projects.
There is no one specific appliqué technique or variation that is considered the original or better than the rest. Appliqué, in this way, is much like the broader process of sewing: easy to individualize.
Sew and Turn
Also known as needle turn appliqué, this technique is one of the most traditional ways in which you can sew one piece of fabric onto another.
Note that the traditionalism of this practice doesn’t make this method the best. On the contrary, it’s up to you to determine which kind of appliqué technique works best for your tastes.
However, sew and turn appliqué is reasonably straightforward and stands as a good technique for beginning crafters to look into, according to Janet Wickell of The Spruce Crafts.
Let’s dive into the method.
Materials
- Backing fabric.
- The appliqué fabric of your choice.
- An appliqué template, homemade or otherwise.
- Straight pins.
- Appropriately-colored thread.
- A sewing machine or a needle.
- Scissors.
- Marker.
Process
Step 1 – Templates
Choose your template from an online resource. Alternatively, you can follow All People Quilts’ advice and create an original template of your own.
Either way, once you have a template available to you, secure it on your uncut piece of appliqué fabric.
Step 2 – Tracing
Trace the template, allowing for a ¼ inch fabric border.
Once finished, cut the pattern out of your appliqué material.
Step 3 – Securing
Attach the appliqué to your backing fabric or project of choice with straight pins.
Once you feel confident in the security of your to-be attached piece, machine-sew the appliqué to the backing fabric, using a straight stitch or hand-stitch along the border.
Step 4 – Cleaning
Use your scissors to cut away bulk fabric, if necessary, and smooth out the seams with your capped marker.
This video shows an example of this appliqué technique.
Fusible Appliqué
If you’re looking for a technique that’s even easier than sew and turn, then fusible appliqué is the method for you.
The writers at Phoebe Moon Quilt Designs note that iron-on patches are some of the most well-known fusible appliqués available today.
Even more appealing, these patches or similar attachable fabrics can be created at home.
It’s worth noting, before getting into the materials needed for fusible appliqué, that there are a variety of fusible webs available that you can use in order to attach your designs to your backing fabric.
Heat-n-Bond and Steam-a-Seam both sell light-weight webbing that is ideal for these projects.
Materials
- Fusible webbing.
- Backing fabric.
- Cut-out appliqué design.
- Scissors.
- Straight pins.
- Thread.
- Needle.
- Marker.
Process
Step 1 – Templates
Once again, you can either create a template on which to base your attachable piece of appliqué, or you can look to the Internet for a variety of pre-made templates.
In either case, once you have a template available to you, secure it on your uncut piece of appliqué fabric.
Step 2 – Tracing and Webbing
Trace your pattern onto your appliqué fabric of choice and cut it out, leaving that same ¼ inch border of fabric for security’s sake.
Once you’ve finished, you can then apply your fusible webbing onto the wrong side of the material.
Trace the design onto the webbing, so that the image mirrors the design you want people to see when looking at your finished project.
Step 3 – Ironing and Securing
Be sure to keep in mind that the edges of your appliqué will be raw. As such, take the appliqué and iron it to your preferred backing fabric.
Secure the ironed appliqué to the fabric with straight pins. Once you’re satisfied, hand-stitch a border around your appliqué to clean up its raw edges, removing the straight pins as you make your way around the design.
Simple, clean, and straightforward!
Freezer Paper Appliqué
Freezer paper is a great tool for these crafts, allowing you to imitate fusible webbing if you’re looking for a more affordable way to customize your project.
Materials
- Freezer paper.
- Marker.
- Backing fabric.
- Appliqué fabric.
- Scissors.
- Straight pins.
- Thread.
- Needle.
- Marker.
Process
Step 1 – Templates
You can either create a template on which to base your attachable piece of appliqué, or you can look to the Internet for a variety of pre-made templates.
Either way, once you have a template available to you, secure it on your uncut piece of appliqué fabric.
You’ll also want to trace your template onto an equally-sized piece of freezer paper and then cut it out into trace blinds.
Step 2 – Securing the Freezer Paper
Place the wax side of the freezer paper down onto the appliqué fabric. Iron this and your template onto the fabric.
Afterward, cut out the design, leaving a ¼ inch fabric border around the appliqué. Once finished, peel the freezer paper off the back of the design.
Step 3 – Connecting the Fabrics
Attach the appliqué to your backing fabric or project of choice with straight pins.
Once you feel confident in the security of your to-be attached piece, machine-sew the appliqué to the backing fabric, using a straight stitch or hand-stitch along the border of the appliqué.
Step 4 – Cleaning
Use your scissors to cut away bulk fabric, if necessary, and smooth out the seams with your capped marker.
Here’s a video showing an example of this appliqué method.
Machine Appliqué
Finally, there is machine appliqué. According to the writers at Pile O’Fabric, machine appliqué is a more automated stand-in for the traditional process by which many appliqués are attached to their base fabrics.
The process of using a machine appliqué technique is virtually identical to that of the sew and turn process.
However, where you would normally hand-sew a border (after having secured the ironed appliqué to your base material), you’ll instead move to a sewing machine and use a zig-zag stitch in order to secure the appliqué.
Conclusion
The techniques touched on here are only some of the variations on appliqué that are used in crafting culture nowadays.
They’re all simple, easy to approach methods, so you can experiment with each and decide which method is best for your own unique project.
Whether you’re adding a special touch to a sweater or integrating classy designs onto a quilt, appliqué of any kind will ensure that your creation is entirely original.
Have you tried any appliqué techniques?