
Sewing and quilting is great fun, but sometimes, huge pieces of fabric are a lot to deal with!
Measuring and cutting an entire yard of fabric to reach your desired size can be time-consuming, and you may not even get the most accurate measurements.
Larger fabrics also mean greater waste. If you just want a small shape, you’ll have to cut around its perimeter. Most of the time, we cut bigger than we need to.
But there’s an elegant solution… fat quarters!
What is a fat quarter?
A fat quarter is a pre-cut unit of fabric. It’s a quarter of a yard of fabric that has been cut to eliminate the selvage edges, making it easier to work with smaller pieces.
Fat quarters are often used in quilting and other crafts that require small pieces of fabric. They’re also great for beginner sewing projects since they make measuring and cutting simpler.
Usually, a fat quarter measures 18 inches x 22 inches if it has been cut by the yard, or 50 cm x 55 cm if cut by the meter.
In this guide, we’re going to look at the popularity of fat quarters in sewing – plus the benefits of pre-cut fabrics, and other types of pre-cut fabrics you can expect to find on your sewing journey!
Let’s get started…
Why We Use Pre-Cut Fabrics
To beginners, pre-cut fabrics may seem unnecessary, but they’re a godsend to the seasoned sewist.
They’re the bundles of fabric that you can find in any fabric store – pre-measured, pre-cut, and packaged for your convenience.
Pre-cut fabrics have many uses; other than saving sewists (especially quilters) dozens of hours measuring and cutting their fabric, they also lessen the chances of wasted fabric when buying by the yard.
Pre-cut fabrics are very useful and, in theory, easy to grasp. When you visit the fabric store, however, you may find yourself confused.
There are countless types of pre-cut fabric to choose from. If you have a project in mind, you may be wondering what kind of pre-cut fabric you should buy.
Each offers different names, measurements, and uses. What’s even worse, some manufacturers name the same measurement of pre-cut fabric differently! How are you supposed to make sense of all this pre-cut madness?
Thankfully, this article is here to guide you! Once you get the hang of pre-cut fabric (and maybe keep a handy, printed reference in your wallet), you’ll be mastering pre-cut fabric in no time.
What Is A Fat Quarter of Fabric?
To understand pre-cut fabrics, we will need to begin with fat quarters. Despite its funny name, this term will be the basis of our pre-cut fabric journey.
So, let’s define it!
A fat quarter is a quarter-yard of fabric that has been cut to yield a larger piece than a traditional quarter-yard.
The term “fat” is used to describe the increased width of the fabric. In contrast, a “skinny” quarter would be the traditional 9″ x 44″ (or 36″) size.
What Size Is A Fat Quarter?
Fat quarters are usually cut 18″ x 22″, though the size may vary depending on the manufacturer. This yields approximately 50% more fabric than a standard quarter-yard cut.
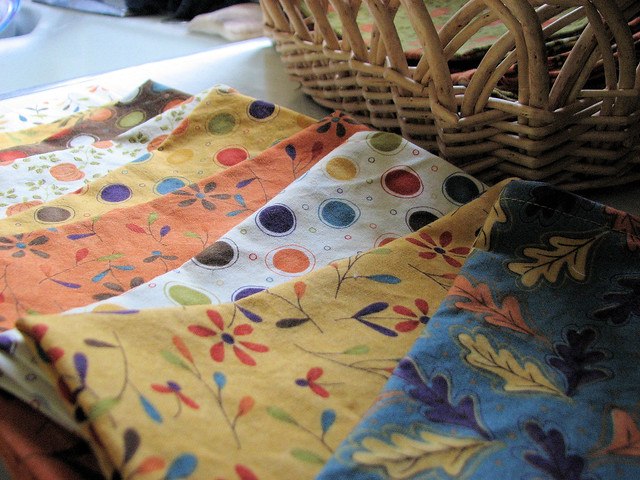
If that’s difficult to visualise, here’s an example of what to expect in terms of shape:
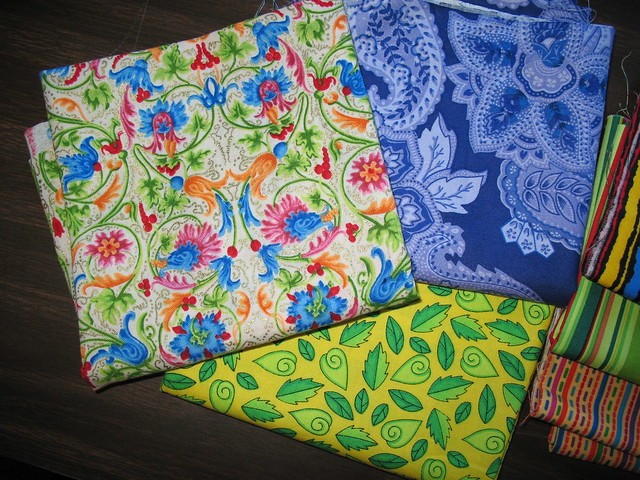
To help you visualize a fat quarter, imagine a bolt of fabric. Then, imagine measuring out a yard of fabric from this length.
How big is a yard of fabric? For those who are new to sewing or those who need a refresher, a yard is always measured in length and is equal to 36 inches.
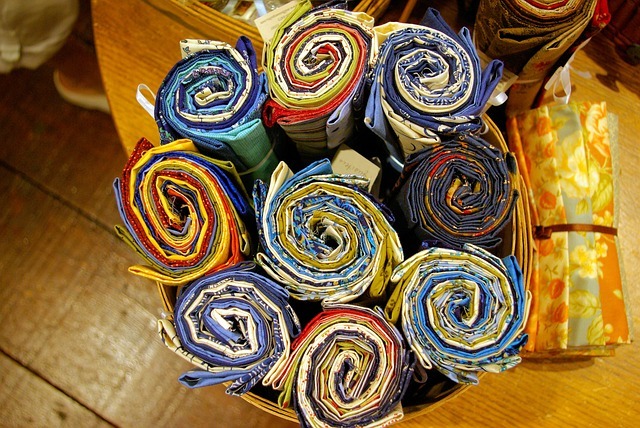
Then, imagine folding this piece of fabric in quarters. Cut the fabric along these folds. You’ll end up with four pieces, or a bundle of fat quarters.
What makes fat quarters tricky? They aren’t always the same in width. Most manufacturers create bolts of fabric 44 inches in width, but this isn’t always the case. Because of that, fat quarters may have different widths.
However, connecting all the bundles should always give you a yard (or, in some places, a meter) worth of fabric in length.
Why Use Fat Quarters?
Fat quarters offer several benefits over traditional yardage:
- They are easier to work with and measure accurately.
- They result in less fabric waste.
- They are perfect for smaller projects.
- They are great for trying out new fabrics without investing in a lot of yardage.
- They are easy to store and transport.
If you’re new to sewing or quilting, fat quarters are a great way to get started. And even if you’re a seasoned pro, they can be a helpful addition to your fabric stash.
How to Use a Fat Quarter in Sewing
There are a few more variations of pre-cut fabric, but fat quarters are already very useful on their own. With the right pattern, you’ll use every bit of the fat quarters you have in your bundle.
The following are steps for a flying geese patterned quilt. This pattern uses up every bit of fabric in a fat quarter bundle, which means that you don’t waste any. It also has minimal cutting.
This pattern can help you understand how versatile fat quarters can be, and the possibilities of pre-cut fabric. For those who are new to pre-cut fabrics, this project is very beginner-friendly.
Flying Geese
Flying geese are a component in quilting. They are a pattern that is composed of small squares (cut into triangles) patched onto a larger square.
When viewed as a whole, the pattern looks like abstract geese, flying in formation in the air.
Flying geese can be used in other quilting techniques as patchwork quilt blocks. They can also be used for a quick way to add accents to a project, or when you need to sew borders.
Traditional flying geese are rectangular, with a width measuring twice its length. If you are referring to a pattern that needs flying geese, it should specify the measurement of your patch.
For this tutorial, we’ll use squares that are 7 ¼ x 7 ¼ inches. Patch eight of these squares together to create a rectangle.
Materials
For this measurement, you will need three different bundles of fat quarters.
For a cohesive color and pattern, try to have at least two identical bundles, preferably plain in pattern and neutral in color.
This fabric will serve as the background for your geese. The other bundle will serve as your geese.
Method
- Cut out your squares. This pattern will make squares that are 7 ¼ x 7 ¼ inches.
- Cut out four smaller squares for your geese. With these measurements, these smaller geese should be 3 7/8 x 3 7/8-inch squares.
- Now, take one of these four smaller squares. With chalk or washable markers, draw a line on the reverse of your square. Make a line from one corner to the opposite corner. Do this for the rest of the squares.
- Take one of the smaller squares and place it on one corner of the larger square, right-sides together. Take another smaller square, and place it on the opposite corner of the larger square, large-sides together. Make sure the edges are aligned. The smaller squares should overlap slightly in the center of the larger square, and the line you drew earlier should run continuously through both squares.
- Pin the small squares in place.
- Sew two seams along the marked lines of your smaller squares, with a ¼-inch seam from the line. Press to set the seams, and do not flip.
- Now, cut along the line through the center of your smaller squares.
- Open the fabrics and finger-press along the triangles for each half of the square. Each unit should now look like a larger triangle, with two smaller triangles sticking out from its bottom edge.
- Now, take another smaller square and place it on top of your larger triangle, against its tip, right-sides together. The lines you made should be running from the tip to the center of the triangle’s edge (between the two smaller triangles). This smaller square should jut out slightly.
- Sew two seams along the marked line, with a ¼ seam from the line. Press to set the seams, but do not flip.
- Like the previous squares, cut along the marked line.
- Press the triangle open. At this point, you should have four units of rectangular flying geese!
This video goes into more detail on fat quarters.
Fat Quarter Pillows
For those who want a more functional project, you can create this quick and easy fat quarter pillow.
Since it demands very little sewing, it’s a great beginner project!
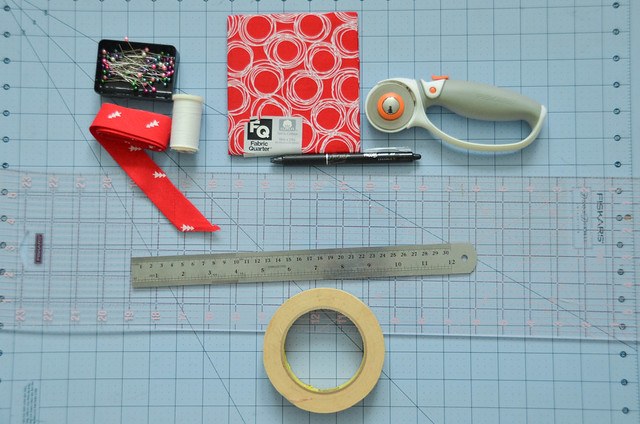
Materials
- A bundle of fat quarters.
- Matching thread.
- Pillow filling.
- Straight pins.
- Yardstick.
- Thread.
- Needle.
Method
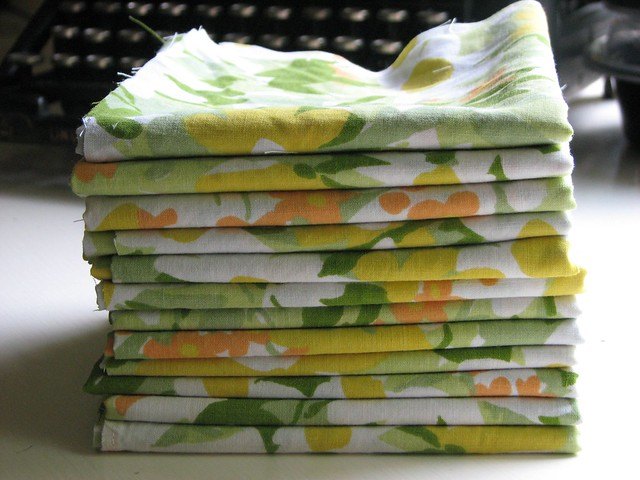
- Prepare your fabric pieces. Try to match them in terms of color and pattern. Iron them to remove the creases.
- Place two pieces (which are complimentary in color and pattern) together. These pieces will make the front and back of your pillow. There’s no need to determine which one is the front or the back fabric for now.
- Place one piece of fabric on top of the other, right-sides together.
- Pin the perimeter of the fabric with your straight pins. One pin every five inches or so should do the trick.
- Now it’s time to mark the seams. Using your yardstick, create a line parallel to the edge of the fabric, keeping a ¼-inch seam from the edge. Make sure to leave a gap measuring at least five inches on one side. We will be flipping our fabric inside out later, pulling our fabric through this gap.
- Now put your fabric under your sewing machine and stitch! Use a continuous backstitch, beginning from one part of the gap and going around the entire perimeter of your pillowcase. Be sure to mind the gap.
- When you’re finished stitching, it’s time to stuff your pillow! Turn the pillow inside out. If you’re having trouble, use a dowel or yardstick to invert it completely.
- Stuff your pillowcase, using your dowel or yardstick to push the fillings deeper into the pillowcase. Make sure not to over-stuff!
- Now it’s time to close the gap that you made earlier. To do this, fold in the seams, following the seams that you’ve already sewed in. Pin it closed and stitch by hand.
For more projects involving fat quarters, check out this list from Crazy Little Projects.
Other Types of Pre-Cut Fabric
When you’re accustomed to fat quarters, you can branch out to other types of pre-cut fabric!
Remember, most of these measurements are based on fat quarter dimensions, cut into further smaller shapes.
Fat Eighth
A fat eighth is a fat quarter that is cut in half. The measurement of your fat eighth will depend on whether it was cut lengthwise or crosswise.
For a fat quarter that measures 22 x 18 inches (made from a yard with a width of 44 inches), a fat eighth cut lengthwise will measure 18 x 11 inches.
On the other hand, a fat eighth cut crosswise will measure 22 x 9 inches.
Layer Cake
Sometimes, your pattern will need perfect squares. For that, you can use layer cakes! Unlike fat quarters, a layer cake is a perfect square, measuring 10 inches on all sides.
There are about four layer cakes in a fat quarter.
Charm Pack
If you need squares smaller than a layer cake, you can use a charm pack! A charm pack is a quarter of a layer cake. It is a perfect square, measuring five inches on all sides.
They usually come in packs of about 40 to 42 pieces and are roughly equivalent to three fat quarters.
Mini Charm
For even smaller squares, enter the mini charm, which is a quarter of a charm pack. It is also a perfect square, measuring 2.5 inches on all sides.
Mini charms often come in packs of 40 or 42 pieces, equivalent to one fat quarter.
Jelly Roll
Sometimes, you’ll need long, thin strips of fabric. For that, there’s the jelly roll! A jelly roll’s measurement is based on a yard’s length of fabric, not a fat quarter’s.
Their length is equal to the width of your fabric. For fabric with a width of 44 inches, a jelly roll will be 44 inches on the longer side, while its smaller side will always be equal to 2.5 inches.
In other words, a jelly roll is as long as two fat quarters. Jelly rolls come in packs of about 40 pieces and are equivalent to about 2 ¾ yards of fabric (or six fat quarters).
Honey Bun
For those who need even skinnier strips of fabrics, you have the honey bun. Also called skinny strips, these strips of fabric are thinner than jelly rolls.
They’re just as long, but their smaller side measures 1.2 inches. Honeybuns usually come in packs of 40 and will be equal to about 1 2/3 yards of fabric.
Honeycombs
Honeycombs, or hexagon-shaped patterns, are popular in the quilting community.
For those who want pre-cut fabrics in a hexagon shape, honeycombs measure six inches from one corner to each opposite corner.
Turnover
For those who want triangles, the turnover is the pre-cut fabric for you.
Like their namesake, turnovers measure six inches along its bottom edge. They are cut from squares measuring six inches on all sides.
This video shows another project you can try with fat quarters.
We Love Fat Quarters!
Hopefully, this has helped you figure out how to use fat quarters and all other types of pre-cut fabrics.
Pre-cut fabrics can open many doors for both sewists and quilters, so go out there and start sewing!
Have you tried sewing using fat quarters?